Reusserland
  • Links
  • Makes
  • Music
  • Travels
  • Top Secret

A Buttload of Christmas and Other Gifts

12/26/2022

0 Comments

 
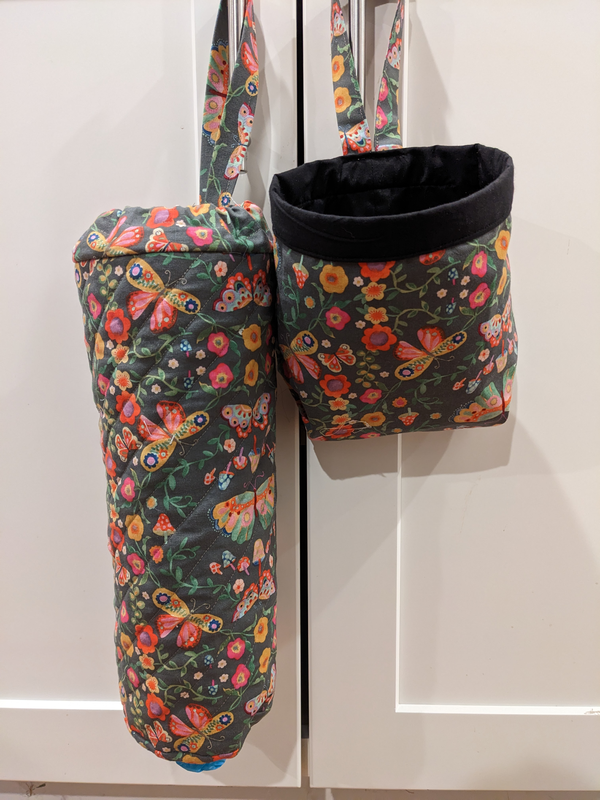
A couple days before Christmas, I got motivated to make some presents for family members: a car trash bag and a holder for plastic bags. Since I could imagine actually using both, I thought they might be appreciated. I made a set for my mother-in-law, my brother-in-law, and my brother-in-law's girlfriend. I chose a fabric for each person I thought they'd like.
Picture
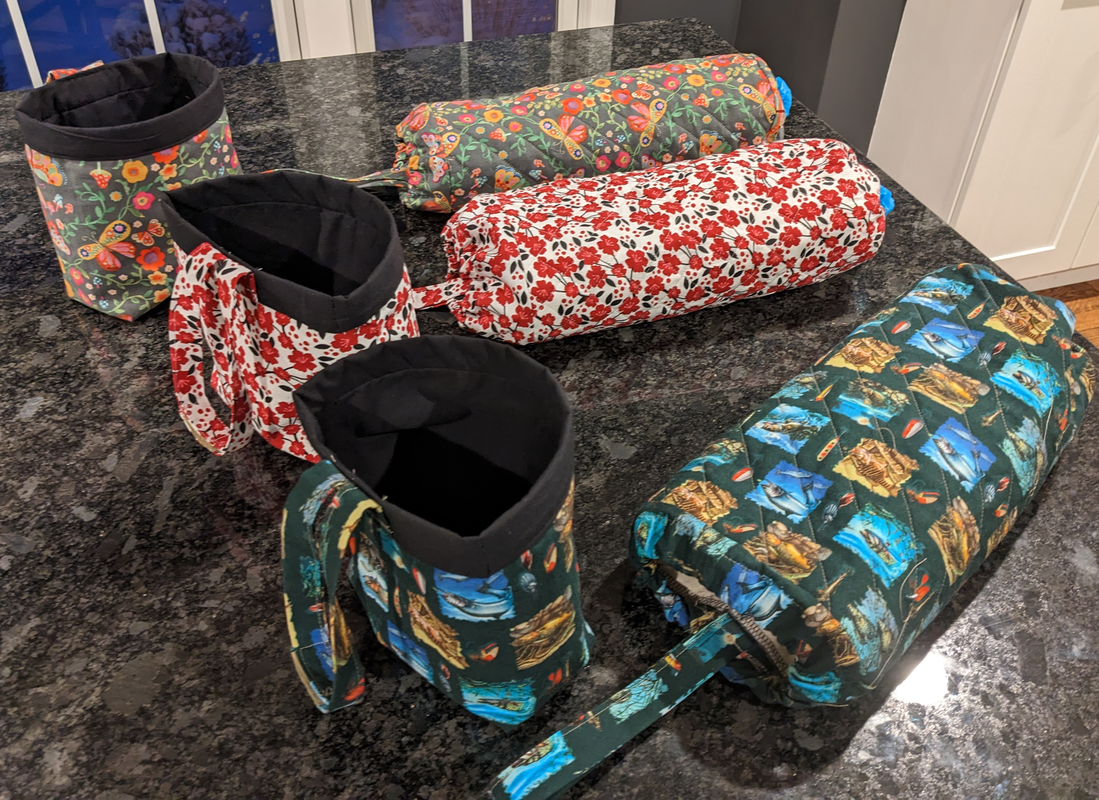
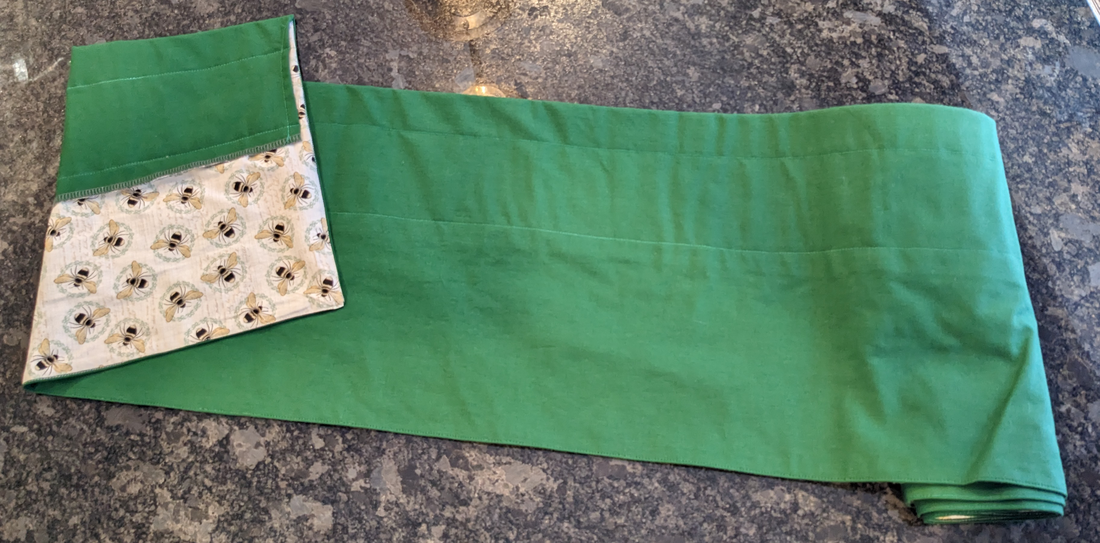
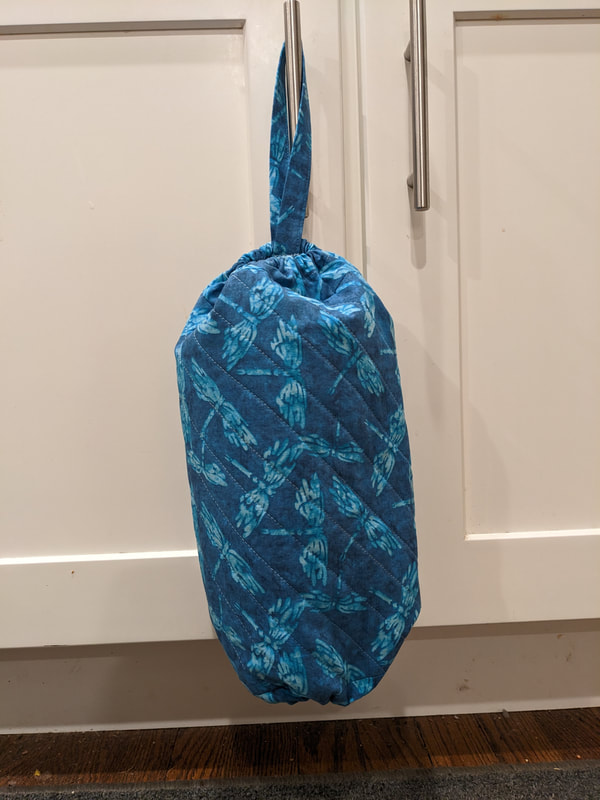
For the car trash bags, I followed this excellent tutorial on YouTube. For the plastic bag holders, I watched a few YouTube tutorials, all similar, all nice. In terms of basic design, especially the handle, I followed this tutorial. However, I had to make adjustments because I decided I wanted to quilt the bags. Once I was done with the quilting, I tried to add the channel along the edges and insert the elastic, which I did but it was not easy. The big problem was that the elastic didn't stretch and expand nicely because of the heaviness of the fabric due to the quilting. So I added a strip of unquilted fabric to the top and bottom, made the channels in those, and put the elastic in them. In the end I really like how it looks and it works perfectly. I love the feel and look of the quilting. It also gives the bag structure and body.
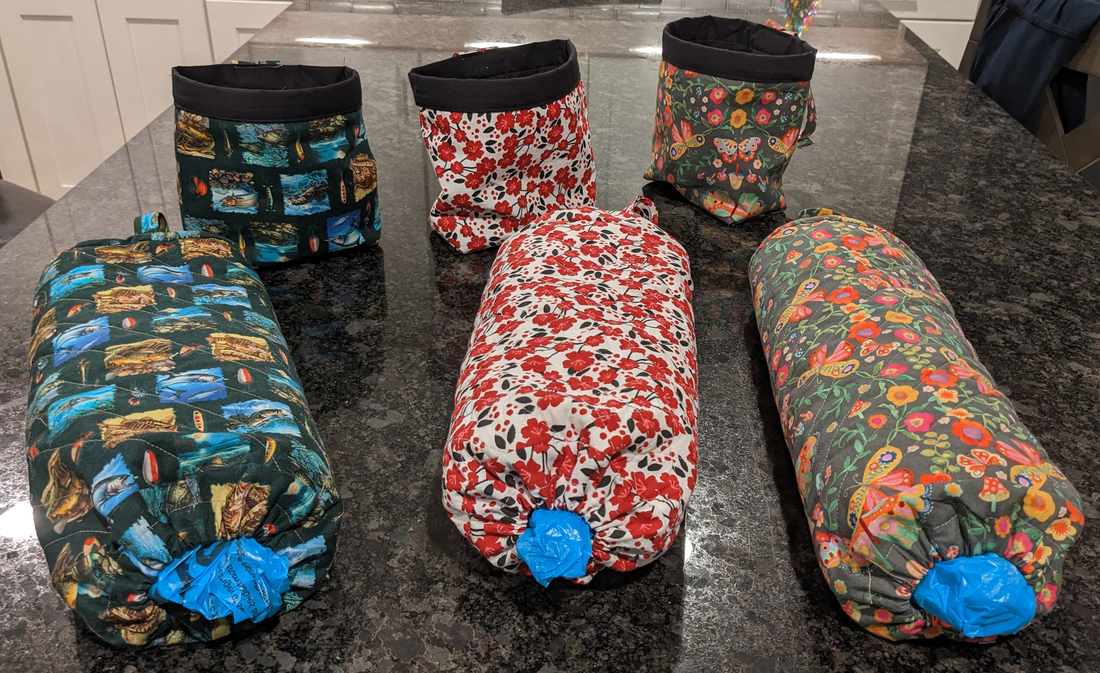
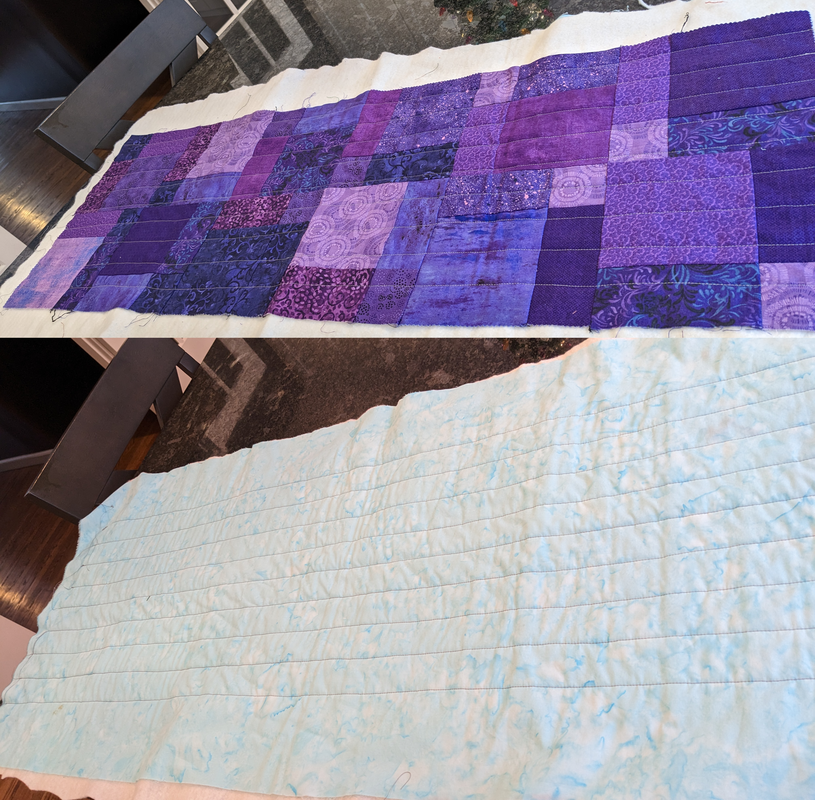
Picture
My mother-in-law's.
Picture
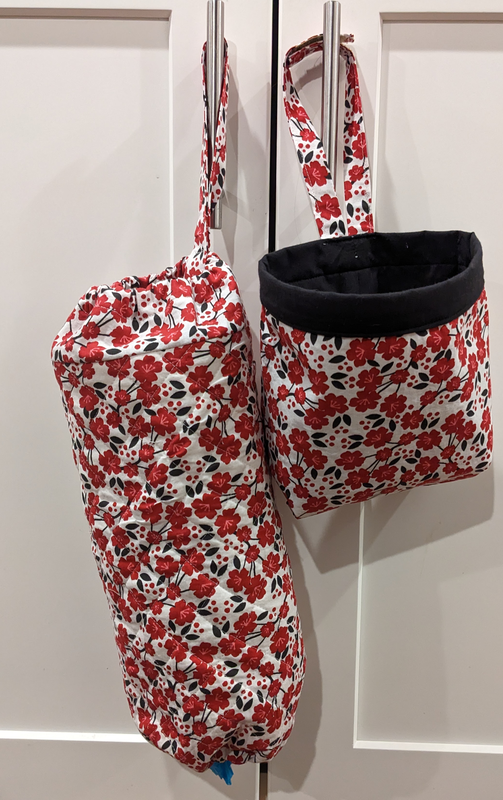
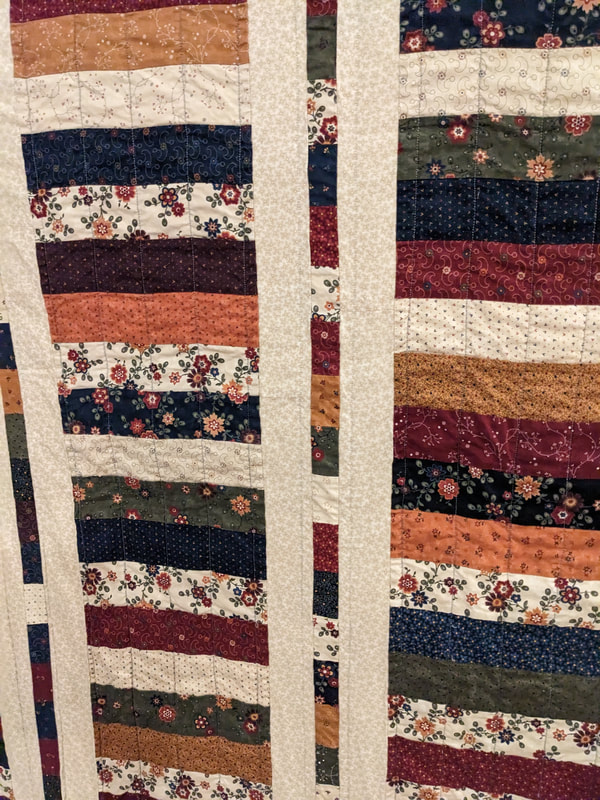
My brother-in-law's.
Picture
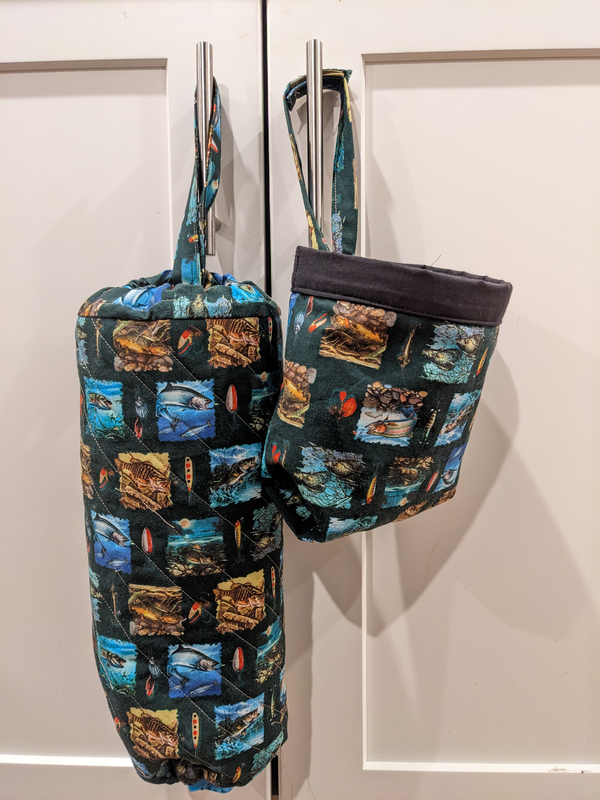
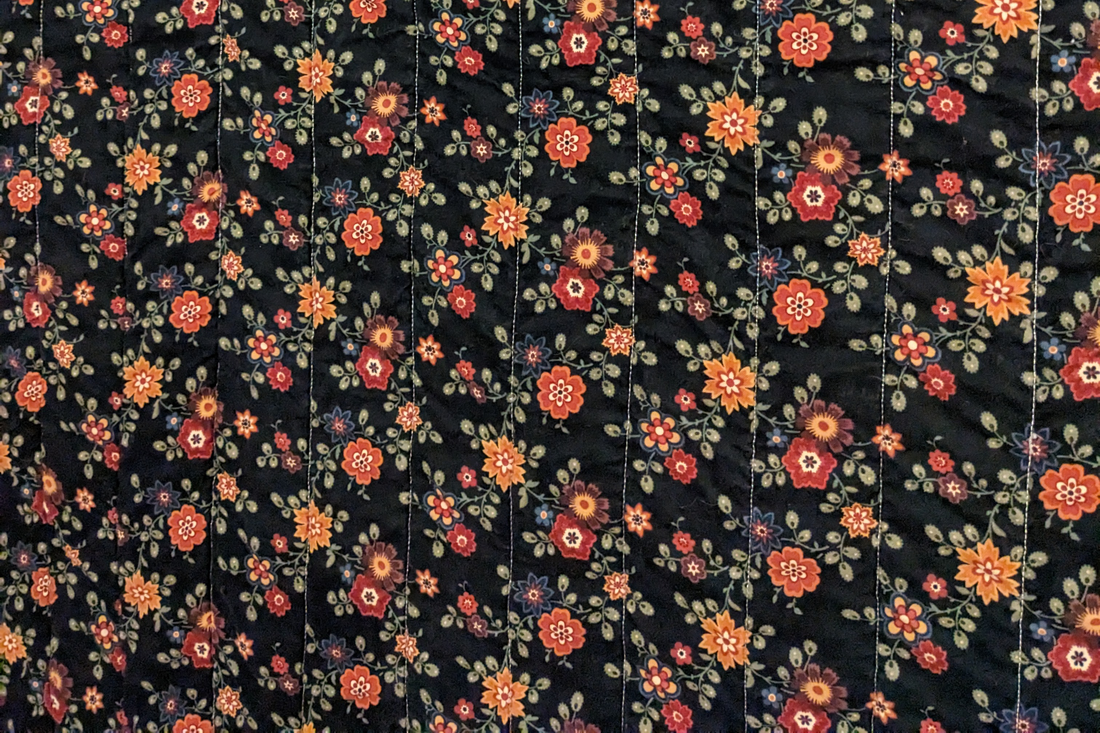
My my brother-in-law's girlfriend's.
Picture
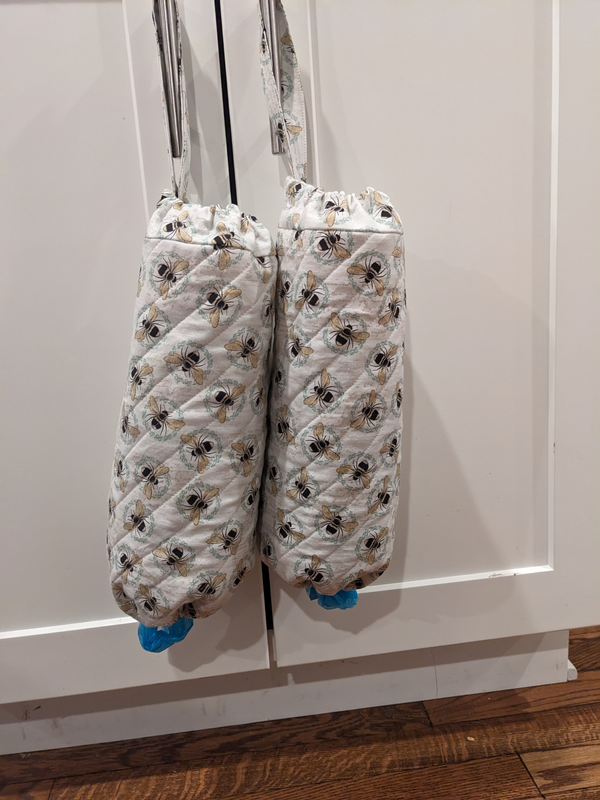
And then I made a plastic bag holder each for my daughter Thome and me!
Picture
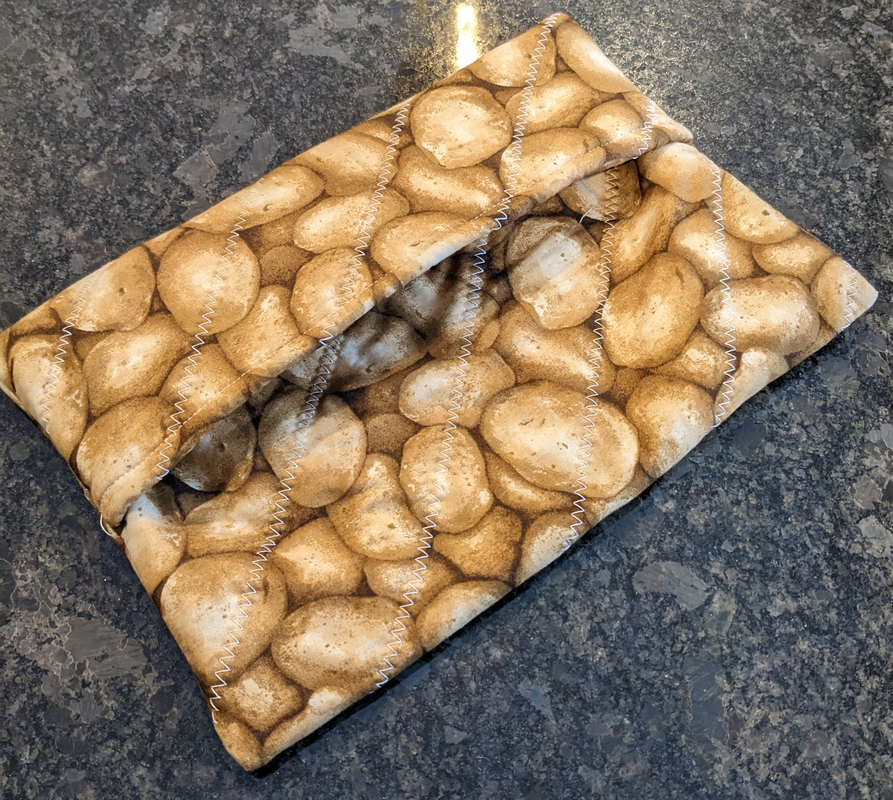
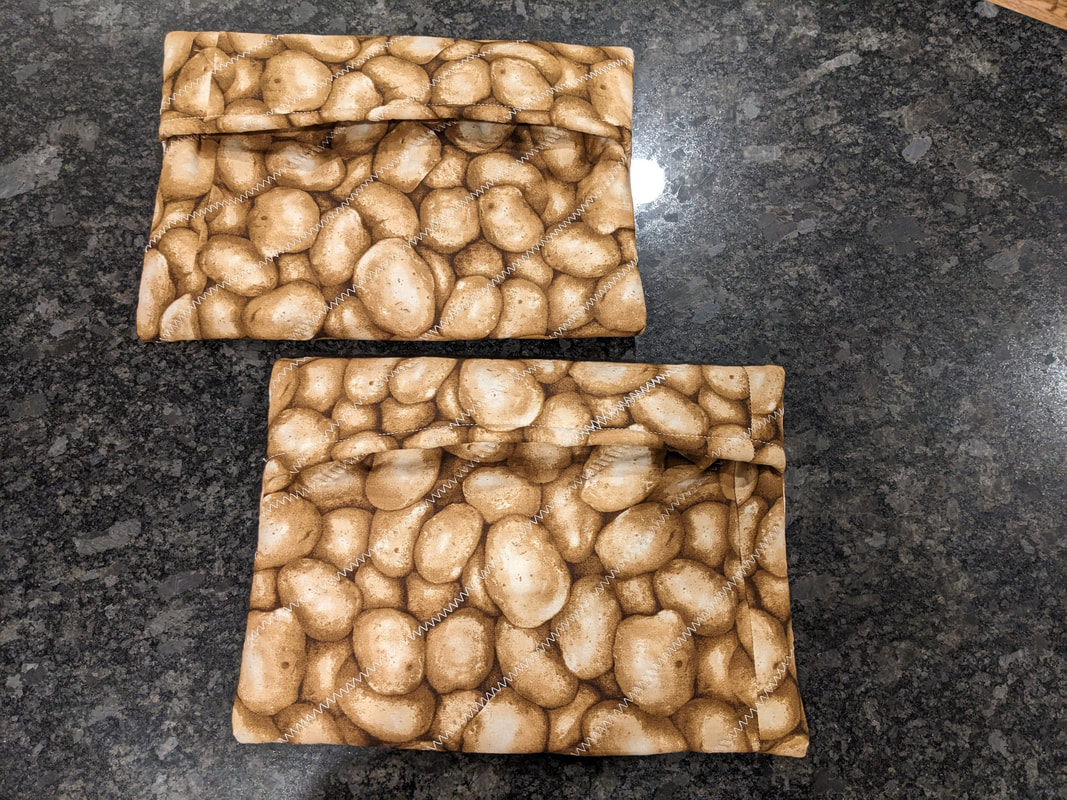
And then, not for Christmas but sewn on the day of, some microwave potato bags for Thome, Thomas, and me. 
Picture
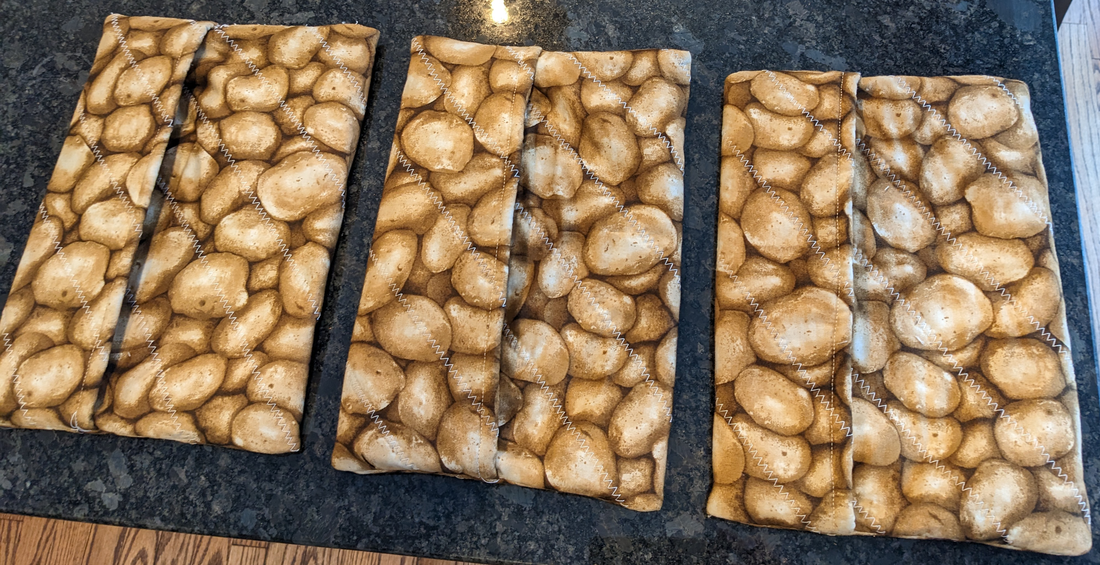
I was given one and ended up loving it. At first, I didn't know what it was, but eventually I thought what the heck and I made a potato in it. It actually works. They taste better than a normal microwaved potato, I swear. They are indistinguishable from baked, IMO. Plus you don't have to prick them, just wash them and toss them in.

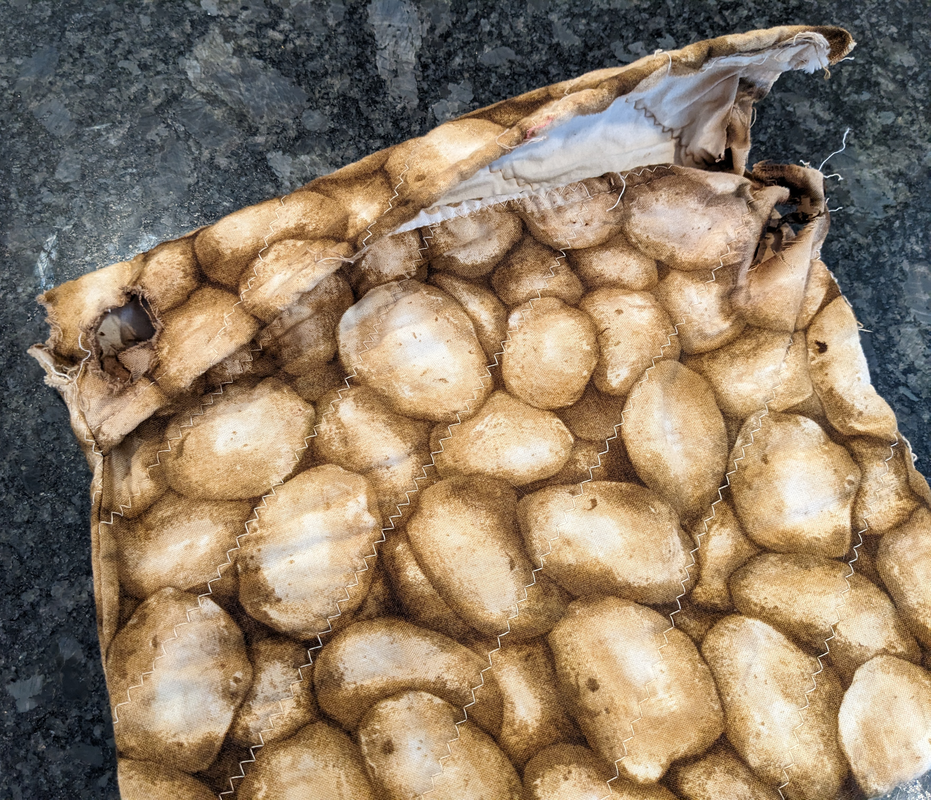
One time I left mine in too long and the bag caught fire on the corners. HAHAHA. So I wanted a replacement.
Picture
Luckily, I happened to come across a key piece of information as I was watching a YouTube video on DIY present ideas. She noted that you need 100% cotton everything for items going into the microwave. She also noted that normal 100% cotton batting has noncotton fibers in it! You need to order a special batting. I used Pellon Wrap and Zap.

The funniest thing is I tried to find the same potato fabric as on the bag I'd been given, thought I couldn't, found something else, and it turned out to actually BE the same!
Picture
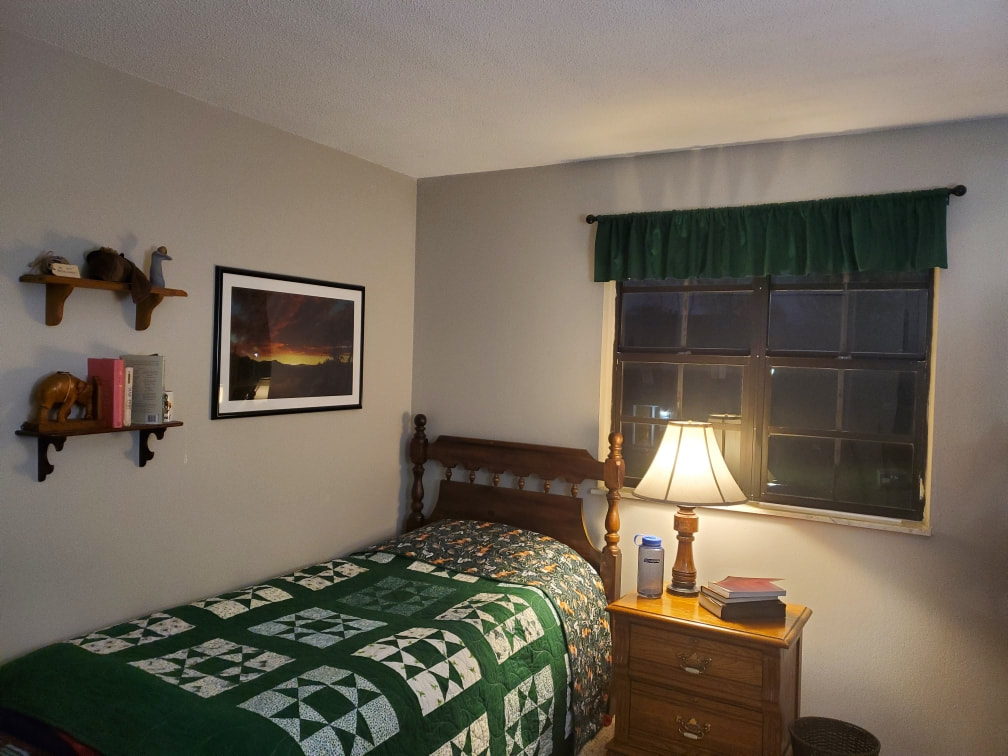
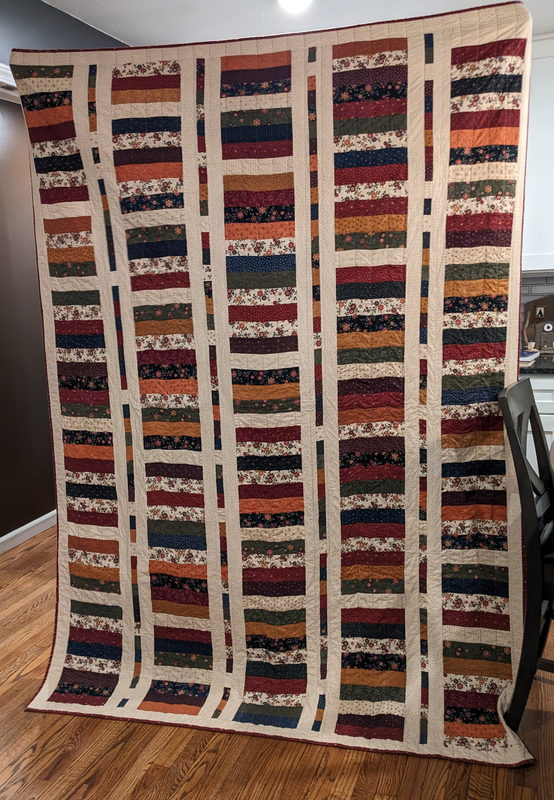
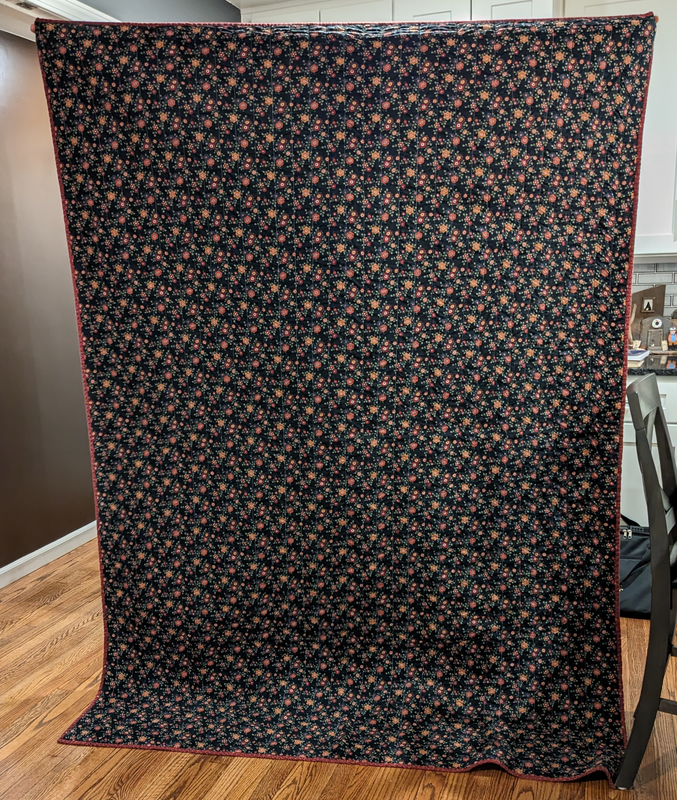
Finally, I made some curtains for my daughter's room in her apartment.
Picture
They'll hang in a fringe, just like the ones I made for my kitchen.
Picture
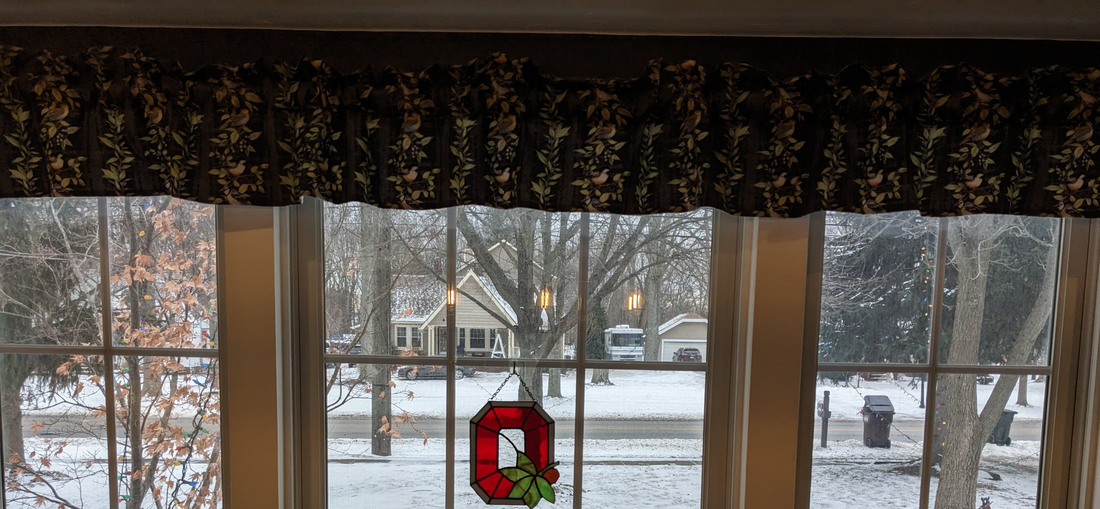
Here are the curtains and her quilt in her room!
Picture
And then, really finally, a couple days after Christmas, I made two of my sisters a potato bag each.
Picture
And then for their (my dad's) house, a dragonfly plastic-bag holder. 
Picture
0 Comments

Sue's Christmas Coin Quilt

12/26/2022

0 Comments

 
I made this quilt for my mother-in-law Sue for Christmas. She's one of my most favorite people in the whole world. 
Picture
It's a coin quilt with a variation in the sashing. I got the gist of how to make a coin quilt watching a good YouTube video, and I saw the variation idea on Pinterest. The fabric collection is one of the Kansas Troubles collections. This one is called Hope Blooms. I was pretty sure Sue would like these colors and patterns!

Here is the back.

Picture
I got the idea to make this in October or November. Whatever it was, it was late in terms of making it in time for Christmas, especially considering the longarmer I use has a queue months long. I thought I could make a coin quilt pretty fast, and I thought I could quilt it myself on my regular sewing machine. Somehow.

It took me a couple weeks to find and assemble the fabrics. It took me about a week to cut and sew the front. Then, it turned out that I didn't have enough of the back fabric, an unanticipated glitch, as per usual. (I thought I couldn't really calculate how big the quilt was going to be before I started. I guessed. I guessed wrong.) I searched and found a big enough swatch of the fabric on Etsy. It came. It didn't match somehow. The design was smaller, the colors faded. And it was all vaguely smelly. I realized they'd washed it (after probably digging it out of someone's basement stash). No good. I searched again and found a better source and ordered plenty. When it finally arrived, at least another week had gone by since I'd finished the front. But I pieced the back together, matching the print, and then it was time to figure out how to quilt it.

It did not go smoothly.

I started by watching a lot of videos: quilting on a regular/standard sewing machine, straight-line quilting, quilting with a ruler, free-motion quilting, top tips when quilting for yourself, top things to avoid when quilting, etc. 

I decided the quilt would actually look good with straight lines. For sure, the learning curve should be lower and the results more predictable. I set my machine up on our big dining room table--a counter-height slab of granite about 3.5 feet by 5.5 feet.

I quilted a test using a table runner I'd pieced in a class. It looked great! It was easy to do.
Picture
So I started sewing straight lines on the coin quilt and freaking out at the lack of control and the crappy results. It looked bad and I could not think of a way to gain more control.  I began to despair.

I went looking for other longarmer options. There are some around, but I was embarrassed to call them in early December asking for a job done by Christmas. I started to seriously consider the possibility of giving it after Christmas. My husband came to the rescue and built me this amazing topper that is flush with the bed of my machine.  I thought I took pictures, but I can't find them. Here is one with Hobbes on top; he's sitting on the table topper. You can see how it's flush with my machine near the scissors and yarn.
Picture
Well, with that invention, it was possible to continue. I tore out a number of rows of stitches and started again. This time I could control the lines because the weight of the fabric was supported. It still wasn't easy. But it was possible.  

In the end, it wasn't perfect, but it was pretty good.
Front close-up.
Picture
Back close-up.
Picture
She loves it!
0 Comments

Thomas's Quilt. A Change

12/15/2022

0 Comments

 
Picture
UPDATE. I wasn't happy with the color of the pieces. I finally decided on a couple colors I like much better than white and black. The white and black did have the same subtle design on them, a same-color raised circle, that I really liked. Oh well. Since I couldn't have both, I chose to go with the colors I preferred.   

Also, my husband pressed me to ask Thomas again about the position of the pieces. My husband said that the game-start arrangement of all the pieces on the first two rows was boring. So I asked Thomas and he agreed and gave me this opening, the "Ruy Lopez," aka "the Spanish." I agree that it looks much more interesting!

Oh, also, I didn't use Heat and Bond on the new pieces. I took a class a local shop, Pins and Needles, on applique and they have another product that is much better. I think they call it "Soft Fuse." It's just as easy to use and just as adherent, but it's is much lighter.  It was a bit of a PIA to remove the black and white pieces, but it's done, and I am so happy I changed the bonding medium. ​
0 Comments

All Nighter with Calvin's Hobbes

12/12/2022

0 Comments

 
Picture
Photo and pattern by Seamster on Instructables at https://www.instructables.com/Stuffed-Hobbes-with-pattern/
​
My son "commissioned" me to make a toy Hobbes as a gift for a friend of his. He sent me a photo of a crocheted Hobbes, but I don't know how to crochet. I said I could probably sew one. I thought I could find a pattern for a tiger and then adapt it as necessary, but instead I found a pattern for exactly what I needed, and it was FREE on Instructables!

It is a very nice pattern and was straightforward to put together. However, the creator, "Seamster," sewed all of his stripes on BY HAND except for the tail. While it does make for perfect stripe placement, it's insane and, ideally, one would figure out a way to machine sew ALL of the stripes on. For reals. I machined sewed the stripes on the tail and the arms and legs. I used a stich on my machine that looks like a whipstitch (#47 for future reference). I even found it worth unpicking the seams of the arms and legs to put the stripes on this way, which I had to do since I was following the pattern and only realized how easy it would be to machine sew after the appendages were sewn into their little sausage shapes. I should have unpicked the body, too, probably. It was a royal PIA to sew the remaining stripes on by hand and took for.ev.ah. I was up all night. 
Picture
One disappointing consequence of sewing the stripes on the arms before the arms were attached to the body is that I didn't realize the top-most (shoulder) stripe was uniquely shaped; it's not a straight 3/4-inch stripe like the others on the arms, legs, and tail. It's curved so that the black covers all the orange up to the shoulder seam. I have a bit of orange. I looks fine but I do like the full coverage better. STILL, one could work out all of the stripe placements ahead of time and mark these on the pattern pieces so that the machine could do all the sewing work. I won't blame Seamster though because he did the most important work on the pattern and very generously shared his work with the world.

I didn't get the legs to come off the body in a way I wanted or liked. I didn't have time to start over though since I was rushing to get it done before my son returned to his house.

My husband ground down the buttons into the oval shape as Seamster did on his tiger.

I made my Hobbes a red scarf as suggested and shown by Seamster. Apparently, this is one of Hobbes's outfits.
Picture
I also made a mask as suggested and shown by Seamster. Again, another of Hobbes's props.
Picture
Here's a photo with both the mask and scarf. Seamster also made a nice tie and a pennant, but I didn't have time.
Picture
0 Comments

    Author

    I am a wife and mother. I am retired: yay! 

    Archives

    February 2023
    January 2023
    December 2022
    November 2022
    October 2022
    September 2022
    August 2022
    July 2022
    November 2021
    October 2021
    March 2021
    January 2021
    December 2020
    September 2020
    July 2020
    June 2020
    May 2020
    January 2020
    December 2019
    October 2019
    September 2019
    January 2019
    July 2018
    May 2018
    March 2018
    February 2018
    January 2017
    March 2016
    April 2013
    March 2013

    Categories

    All
    Costumes
    Dresses
    Home Decor
    Outdoor
    Pants
    PJs
    Quilts
    Skirts
    Stuffed Animals
    Tools
    Tops

    RSS Feed

Proudly powered by Weebly