| Reusserland |
|
|
My husband repainted so we needed new curtains. Looked all over for material we liked and in the end, the best choice was a home decor fabric from Joann's. I had seen it but didn't want to spend $50 a yard, but by the time we decided to go ahead, there was a sale and we got it for half off. There is one large picture window and eight 3-foot windows. I made pillows too. I recovered the one rectangular couch pillow we had, took the stuffing out of a square one and reshaped it and put it in a muslin shell I made and had another rectangular pillow of the same size as the other. Then I had two square blanks and enough fabric to cover them as well. Close ups:
0 Comments
O.M.G. I did it. I completed an actual Upton in real fabric (a lawn). I lost count but looking at this pile, it was at least 10 muslins. This post documents the first set of muslin making, which mostly was trying to figure out which base size to start with and a few major adjustments (lower bust point, lengthen torso, and do forward shoulder adjustment). I went with a size 4 and a C/D bust. I also lost track of all the changes I made, but here are those I remember:
Oh yeah. I did add the pockets but could have kicked myself after. I don't really need pockets and I think they might disturb the fall of the skirt. Also, I didn't put notches on the pattern where they were supposed to go and I put the a little too low. Still this is super comfortable and I'm pretty pleased. I'm not sure I like the box pleats. The next one I make (I bought the fabric at the same time I bought the fabric for this version) might get regular pleats like on the McCalls shirtdress I made that this Upton is supposed to be an improvement on. It is, with the possible exception of the pleats. Oh, I almost forgot. I discovered a couple new things about my machine. First, OMG it's so easy to sew buttons on with it. However, I had to lower the feed dogs to do it—that's how it's done on my Pfaff—but I forgot that the stupid things get stuck when put down. So, I found a single YouTube where a guy explained how to fix it on a machine similar to mine (the predecessor, I suppose), and I managed to fix mine using his information even though my machine is not constructed the same. They updated the guts but still made a feed dog mechanism that sucks. Finally, my buttonhole function is going haywire. I sewed about 5 buttonholes, and it started screwing up, jamming and bunching thread. Then I noticed only 1 of the buttonholes I'd sewn was correct. I had to take them all out and research alternatives. I found a good YouTube that showed a system that worked for me.
The Upton fitting directions say to sew up the WHOLE dress for each muslin. Thank goodness I was reading Sarah Veblen's fitting book while I was working on this dress. She says no to sleeves and skirt, just fit the bodice first. I also found her HBL or horizontal balance lines very helpful with the second set of muslins. But I learned how to adjust the princess line by watching this really helpful video where she explains how a princess seam is just a version of a darted bodice and how to get a good line for your body.
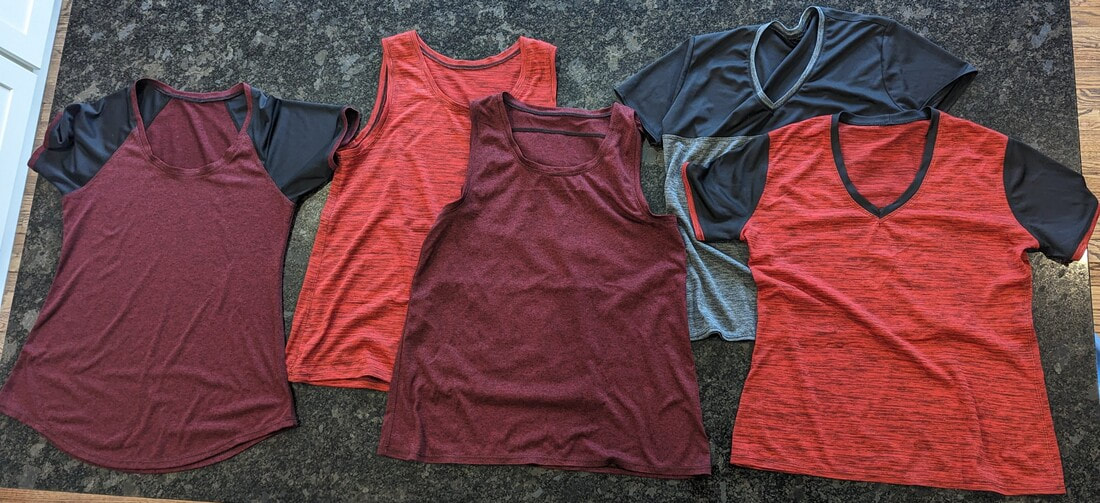
It's hot now, and I need some tank tops for tennis! The two Aura tanks I made out of Nike fabric are super comfortable, and I love wearing them. So I decided rather than hunt in a crap shoot online for the right fabric, I'd head on over to Salvation Army and find some XL shirts with fabric I could see and feel. I found a lot of shirts that would work and got five. That's probably got way more than I needed, but, what can I say? I thought it would be such a simple thing to sew these into tank tops, and I guess I got carried away. Too bad it didn't turn out to be so easy. Before After Putting the shirts together went so quickly at first...cutting out the front and back and sewing up the shell; then, it went downhill fast. It was tedious and time consuming. It took me about 4 days to finish all of these once the front and back were sewn together! Here are the steps.
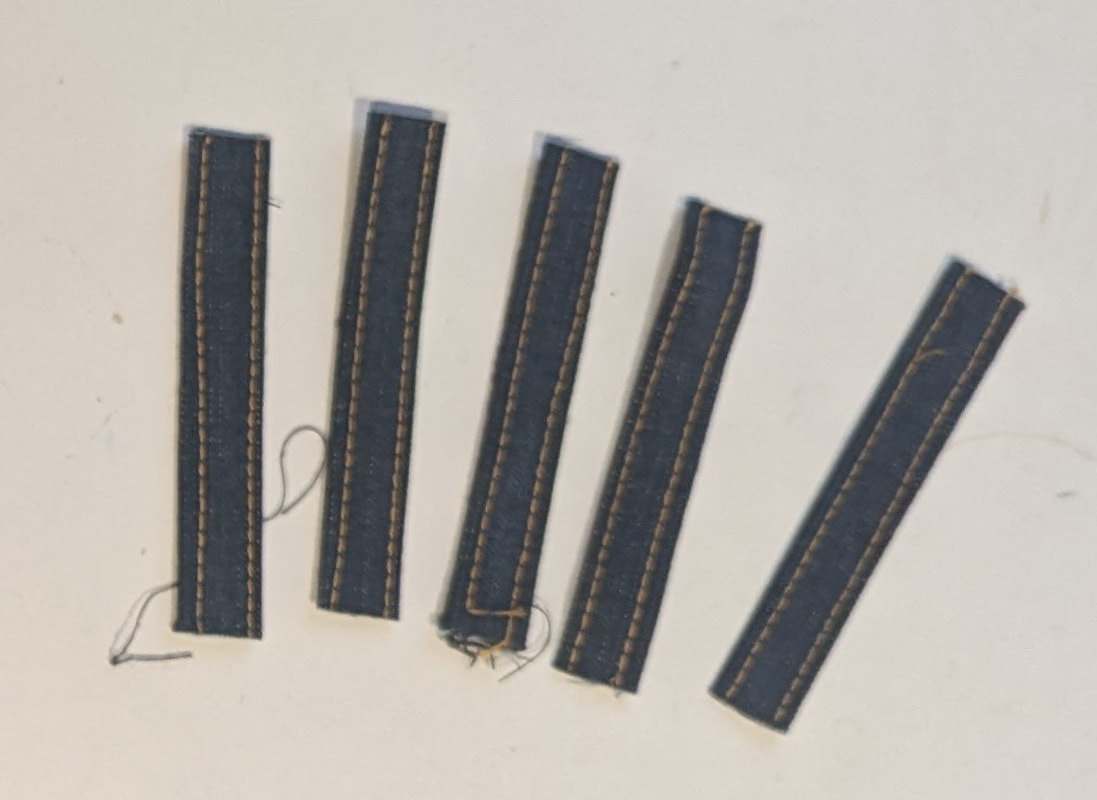
These days, I baste stuff together before going to the serger; it's too easy to fuck up on a serger with the tiniest wrong movement, and it's too much to serge and hold a seam together, especially where bindings, narrow seams, and armholes and necks are involved. So I like to have the seam secured first so there is only one thing to do on the serger—follow the basted line and sew. Why did it seem so endless and tedious? Well, with 5 shirts, that's 5 neckbands and 10 armholes for a total of 15 bindings, which equals 100 percent Crazy Town. Here's a close up of the bands. So, as I suspected when sewing, the neckbands are too big. So it goes. I also notice on seeing these photos, that these shirts are all way too long on me. I could shorten them by 2 or 3 inches, I think. Another day. Jeez, it took days and hours and hours each day. I don't know how people finish things in a day. I could never finish a project in one day, even the "simplest."
Theme: sucky fit and excessive ease in big-company commercial patterns. I wanted to make a robe for a friend and I figured I'd use the same pattern I'd used to make my robe. Since I was making a different size and she is short, I decided to make a muslin. Before I made it, I chopped 4 inches off the length of the front/back and the sleeves (because on mine the sleeves are way too long). When she tried on the muslin, the sleeves were still an inch too long. The front hiked up above the horizontal line I'd drawn for fitting, indicating the need for a full-bust adjustment. I mean, it's just a robe, but an XL with no dart? They go to the trouble of making you cut and sew a two-part sleeve, but the fit of the overall robe is terrible. What surprised me was how voluminous the sleeves were. It was insane. plus, they are very low, and I worried it would restrict arm movement, especially when I narrowed the sleeves. So I cut another inch off the sleeve length and narrowed the top of the sleeves 2 inches and the underside another 1.5 inches. I also added a dart and did an FBA of 1 inch. Unfortunately, I was too lazy to raise the armhole after all that. Then I sewed it up in a flannel print she'd purchased, added some satiny lining fabric for trim, and voila, fits pretty nice, looks pretty cute. Damn, maybe the sleeves are still too fricking long. Here is my robe. I don't think I ever put it in the blog. I wear it, but the sleeves are annoying. Here's a better view of how long the sleeves are! Maybe I made too big a size or something. I never noticed wearing it that it was oversized, other than the sleeves.
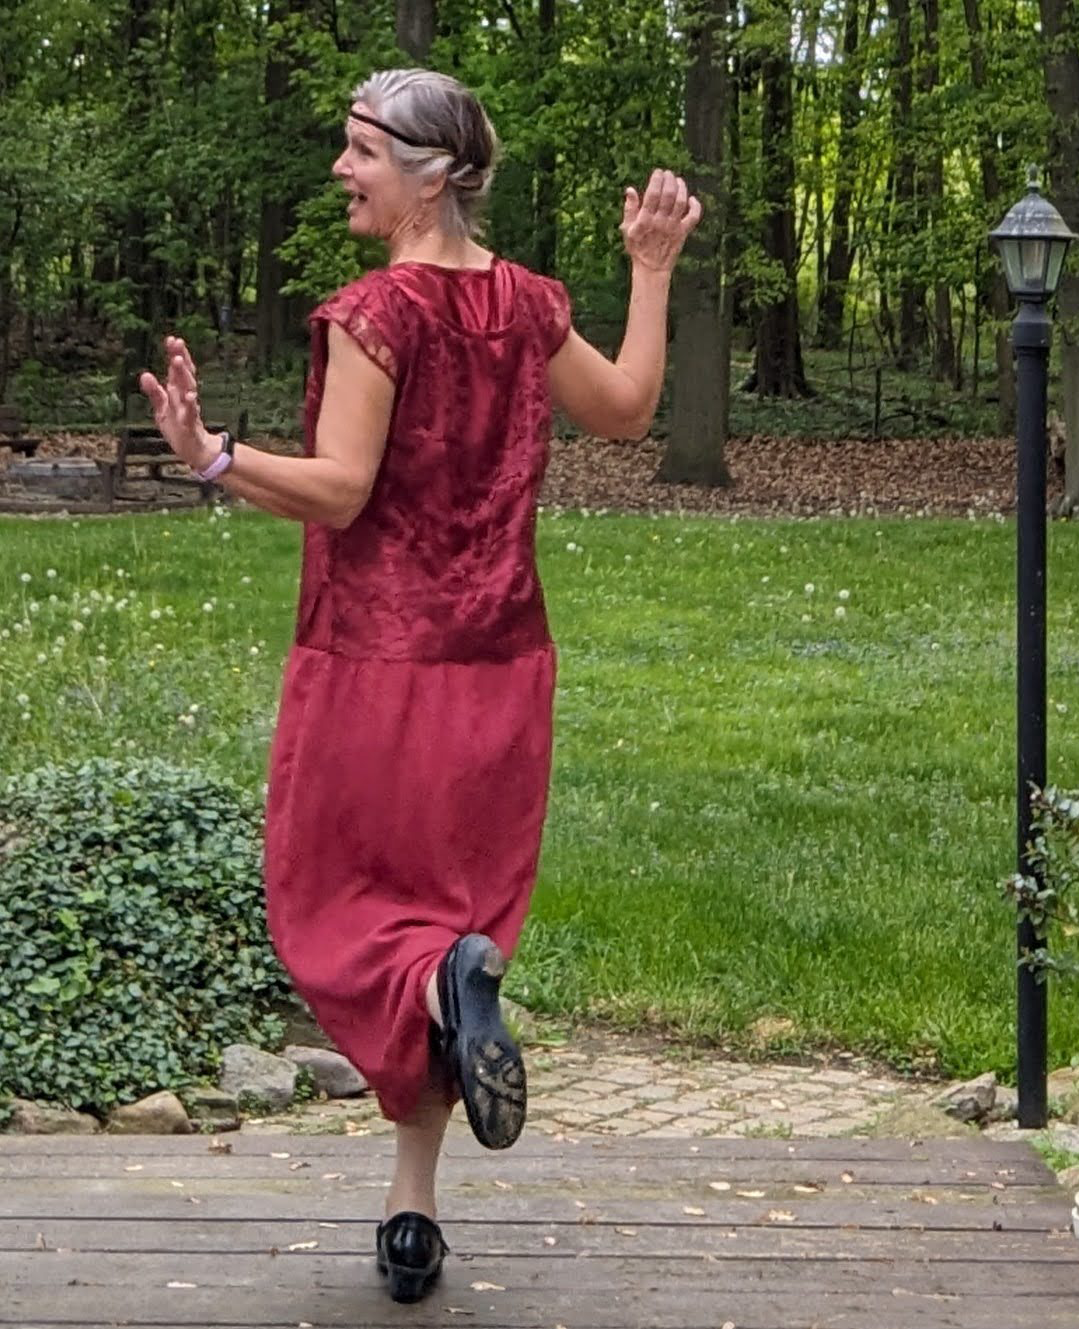
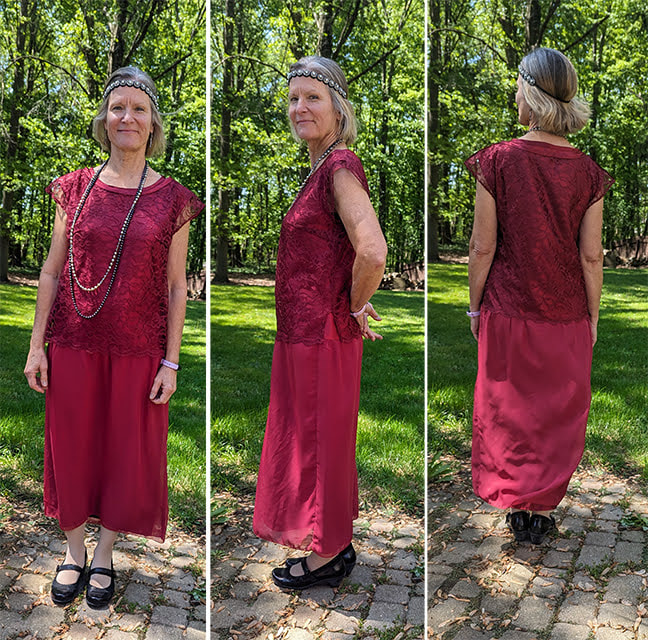
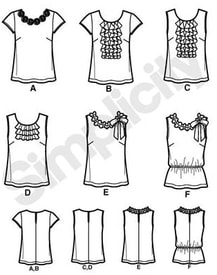
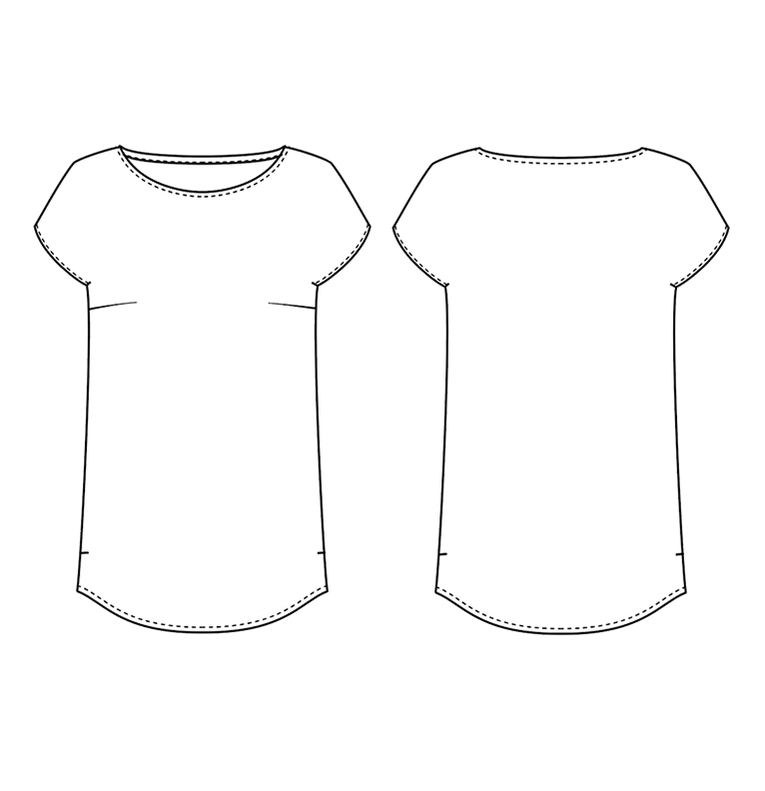
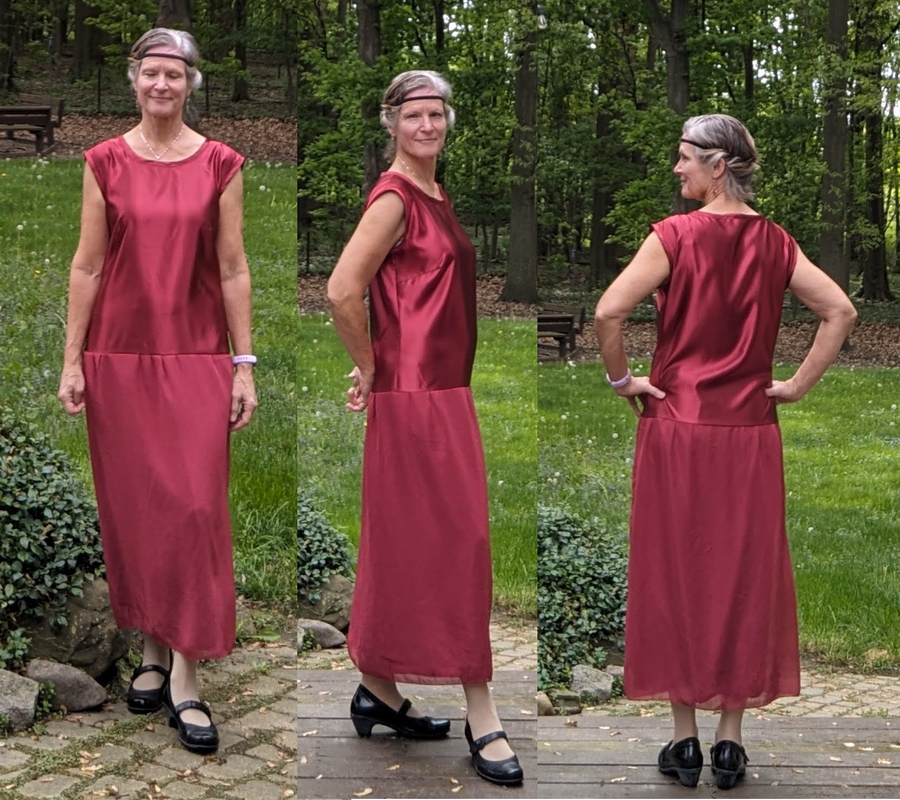
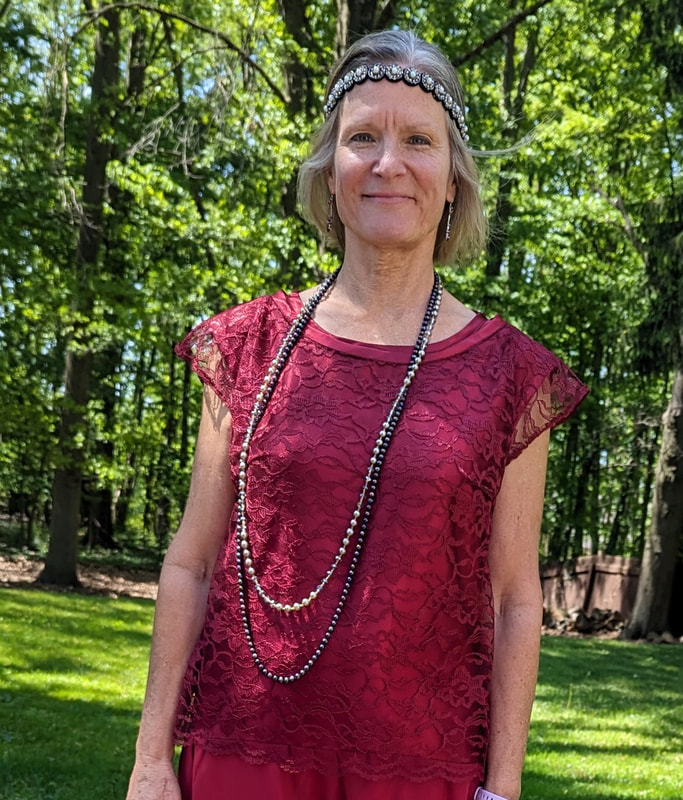
Descended into lunacy yet again. My community orchestra is doing movie tunes and the management announced that we could dress up. So of course I thought I would make an outfit. Ironically, I just want to make it. I don't even want to wear a costume to play an orchestra concert! I planned a very simple outfit. It took me hours and hours and hours to make it. From getting the (cheap) fabric I wanted in the right color to making pattern adustments and mockups to cutting and sewing polyester charmeuse and polyester chiffon (OMG), it took longer than I anticipated. Also, in addition to forgetting to put on my necklace for this photo shoot, I put the lace overlay on backwards. HAHAHAHA. I saw a photo of the front view, and I thought, "crap! how do the necklines not match?" Well! At least it's better than discovering I sewed it wrong! The picture below has the dress on the right way. The top of the dress is Simplicity 2599. I made it big, size 14. The skirt is just a rectangle I cut wide enough to be larger than the bottom circumference of the top so the skirt would gather a tiny bit. The lace overlay is Seamwork Akita, also size 14. So I am not buying shoes to go with this but I have some I thought would work pretty well. Eh, not so much. But still, they'll have to do.
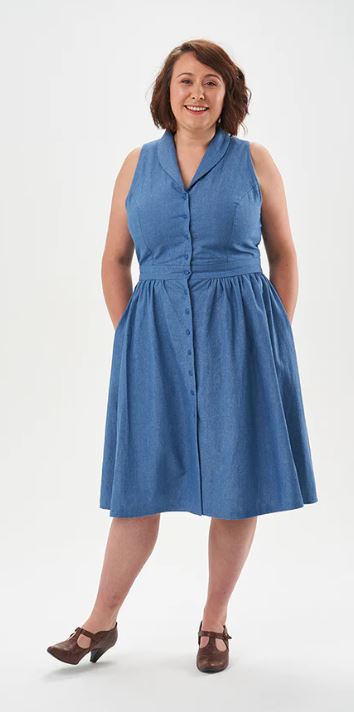
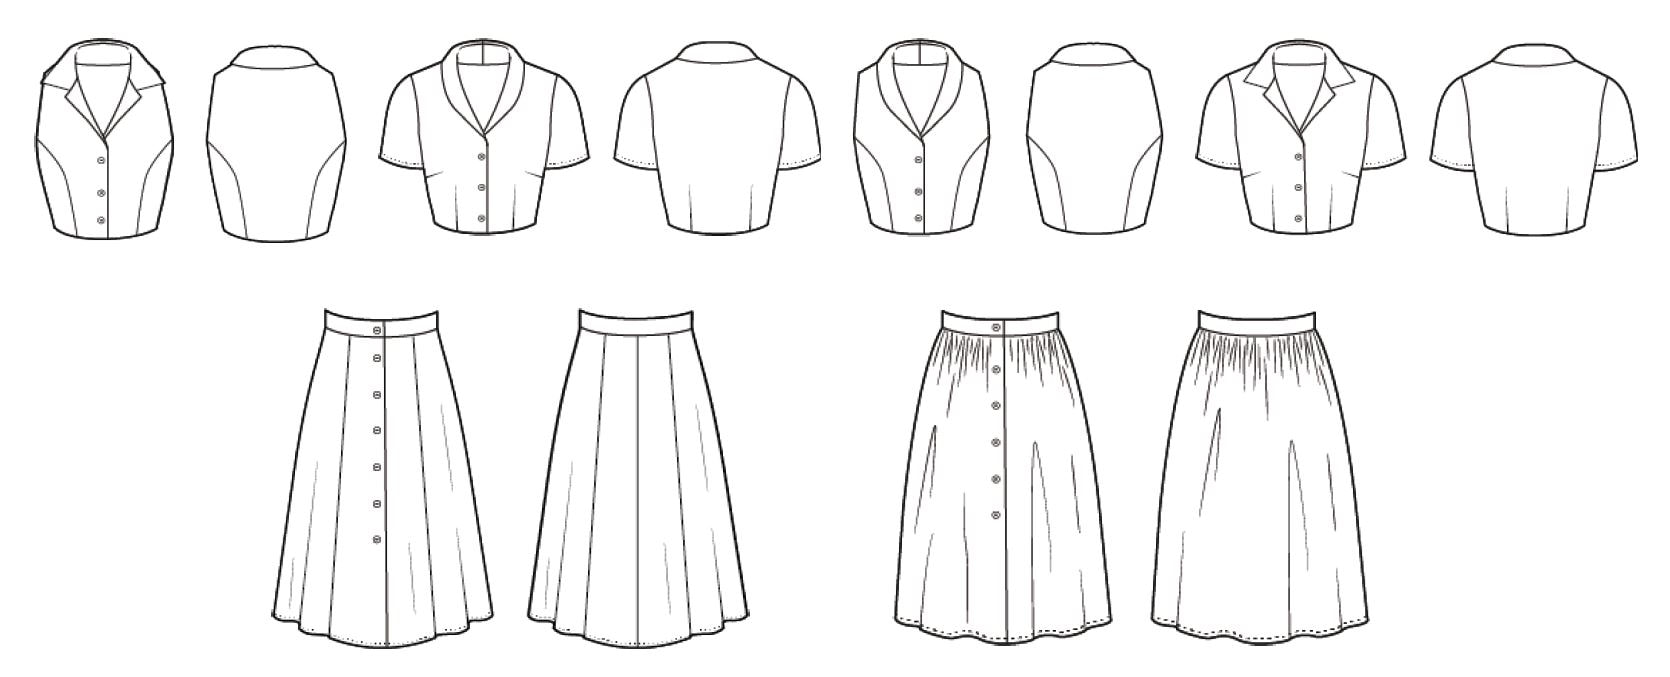
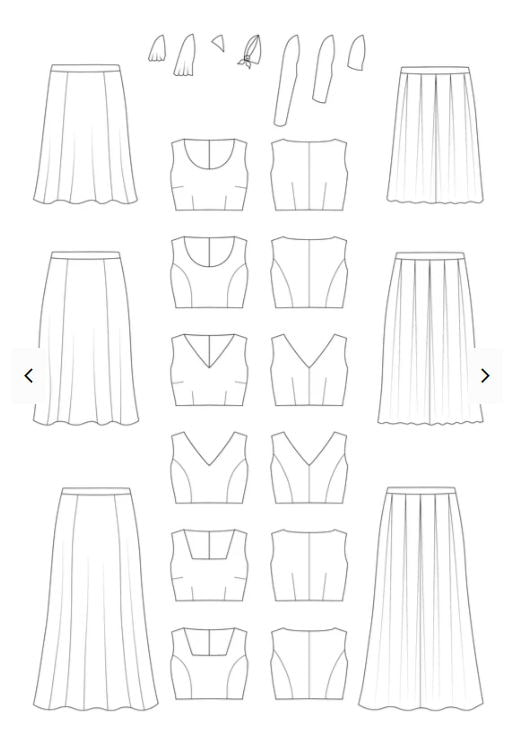
I want a damn shirtdress that fits me and is styled to my liking, i.e., round neck, collarless, and button front. My "fixed" McCall's 6696 is better than it was (and wearable, I suppose), but still the back is too roomy, and I want it to be perfect. So I went on the hunt for a good pattern. I got a Kitty Shirtdress by Sew over It patterns. It has a princess-seam option, which I really like, and other options for collars and skirts. Still, I dreamed of not having to alter the pattern, and here I'd have to remove the collar, adjust the neckline, and figure out how to add sleeves to the princess-seam bodice. Oh, plus only one cup size. I wasn't feeling the FBA. I chickened out. Then I saw the Upton by Cashmerette. I was under the impression that Cashmerette patterns might be drafted for shapes closer to mine, which, I learned after lots of muslin-making, turned out to be not true. But with the expansion pack, you get a lot of options for darts or princess seams, sleeves, and skirt. Plus, different cup sizes! So I decided to sew up the Upton. Sidenote
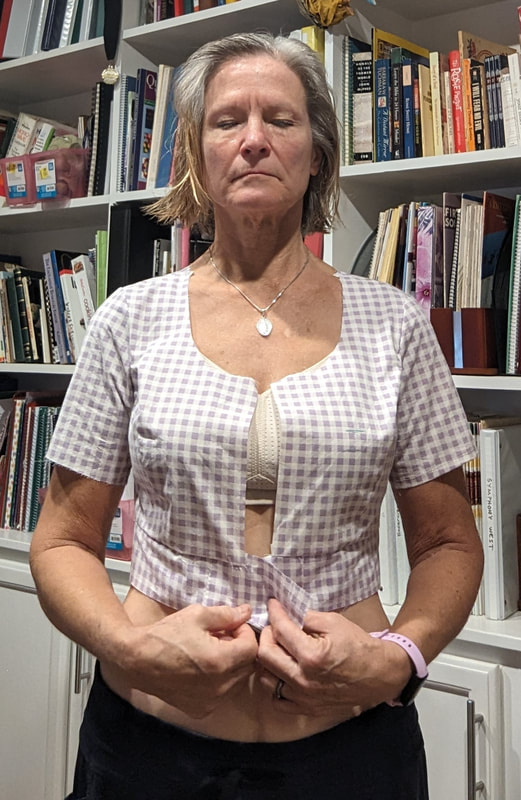
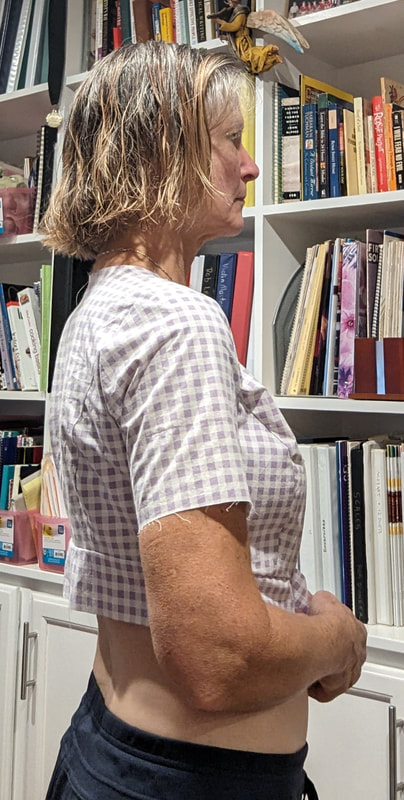
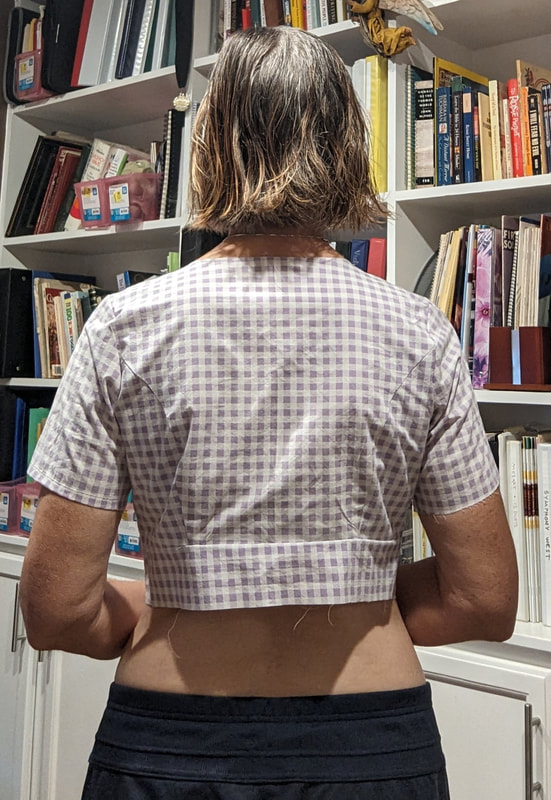
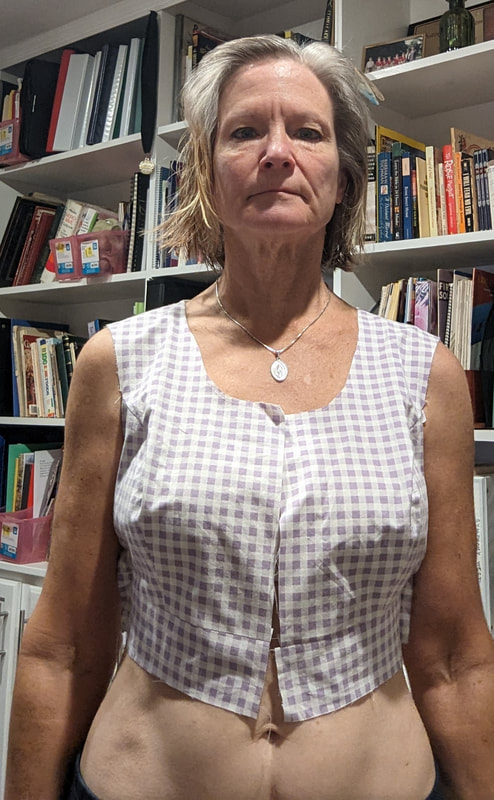
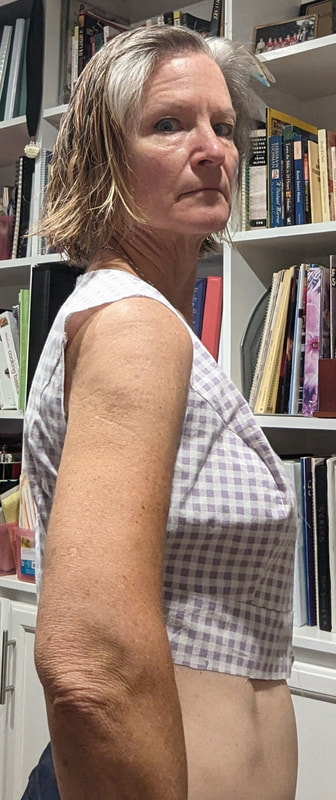
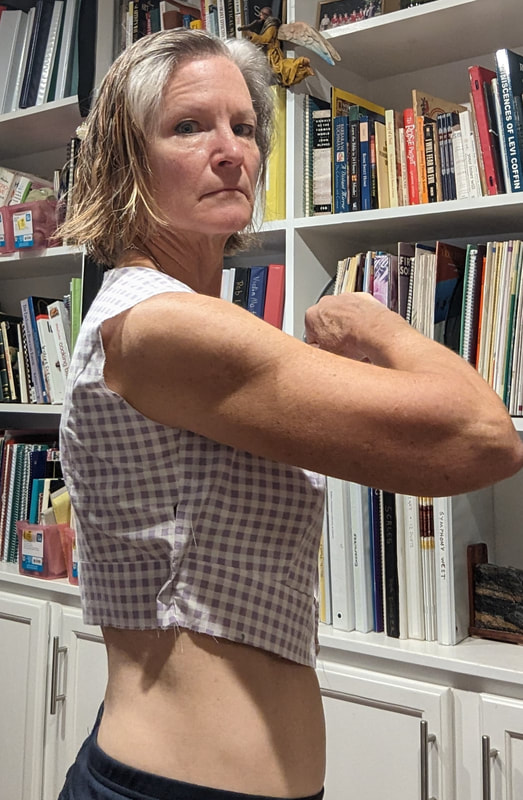
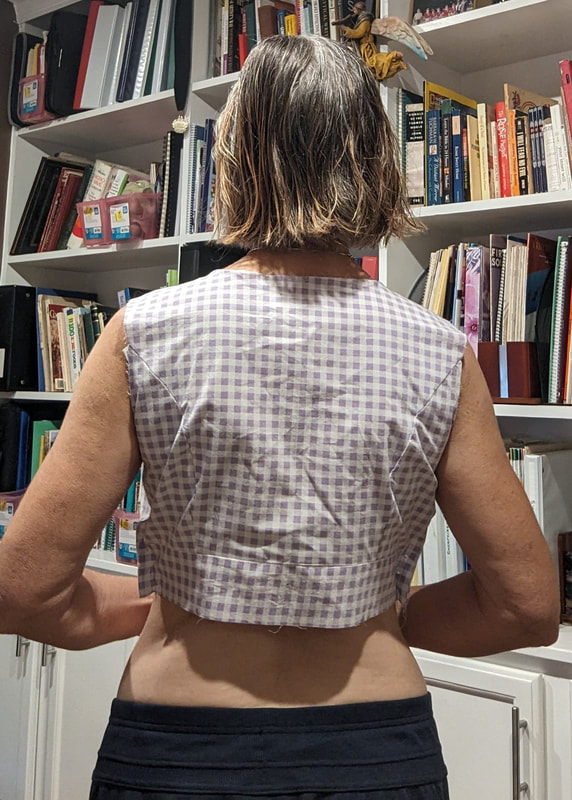
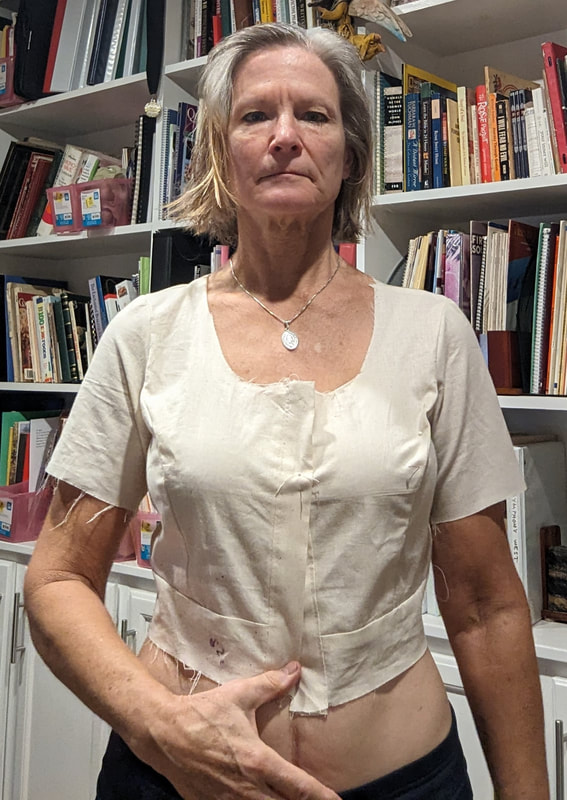
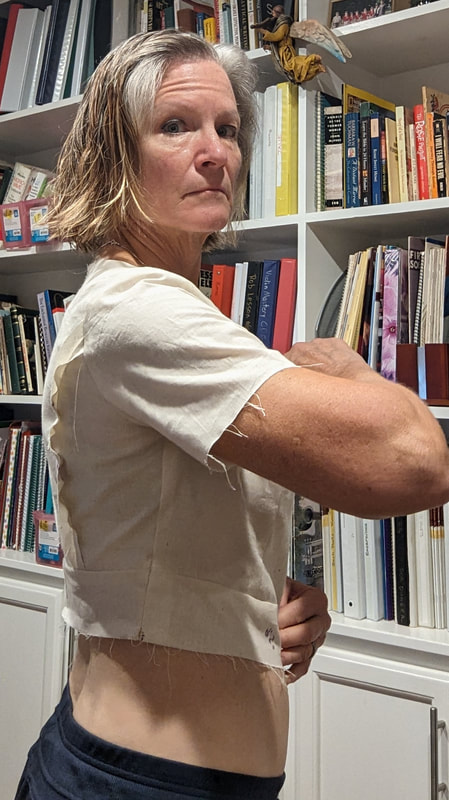
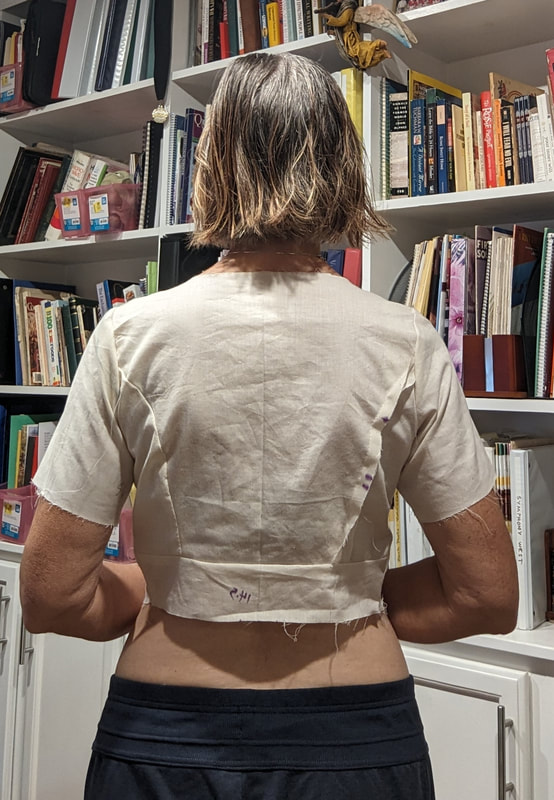
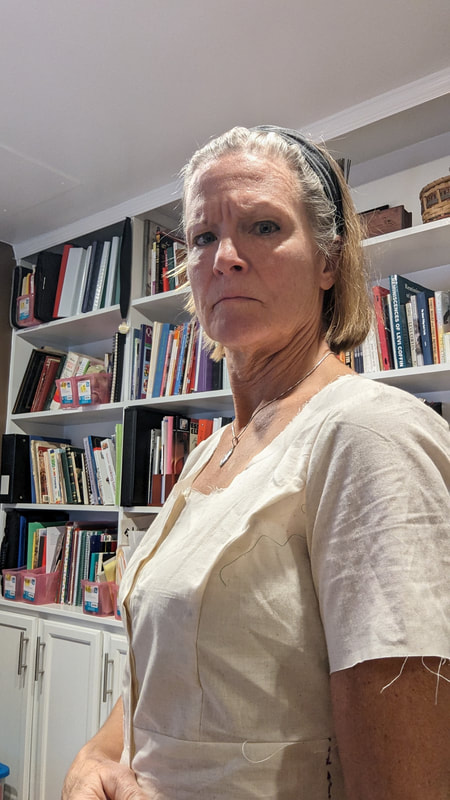
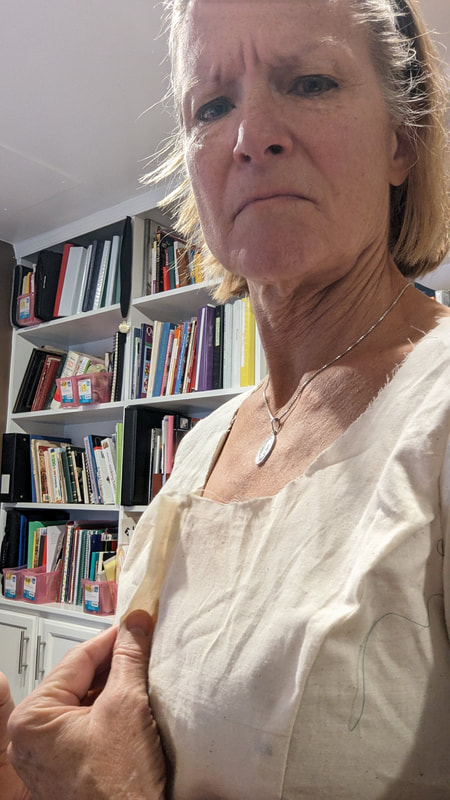
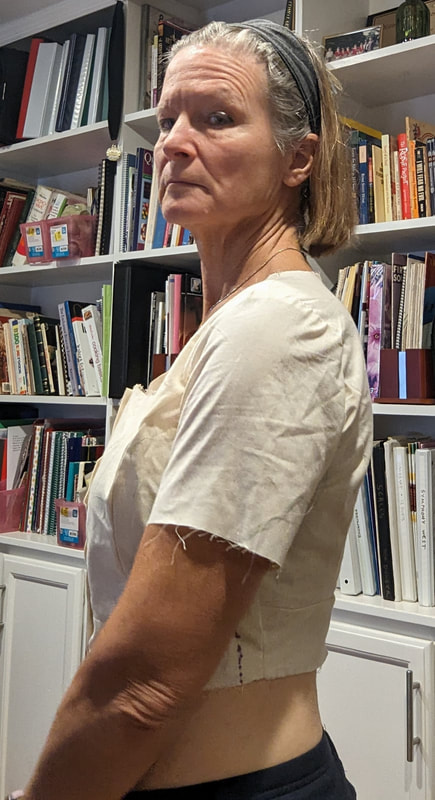
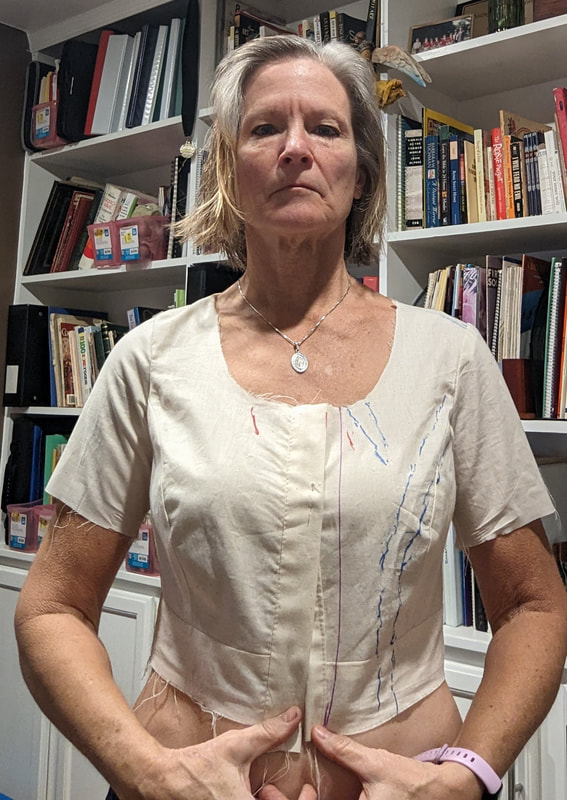
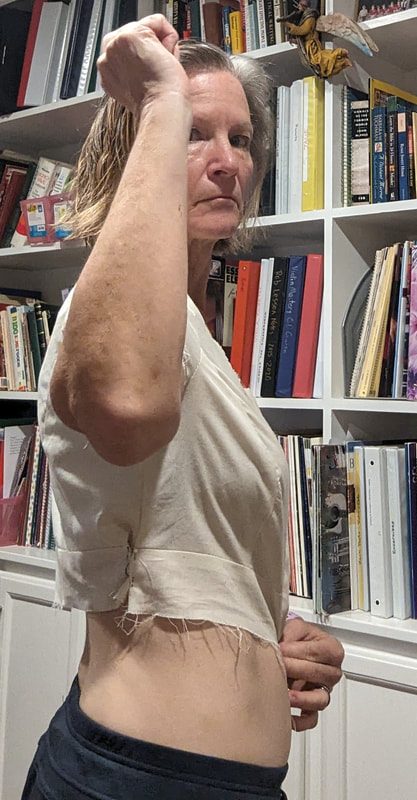
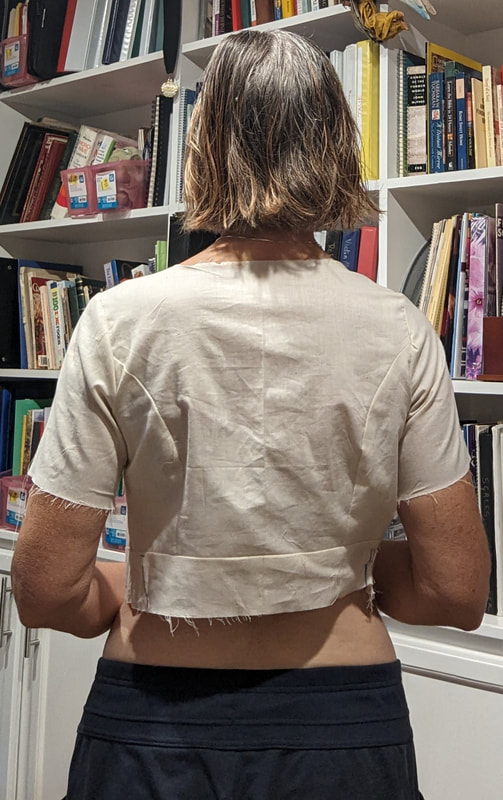
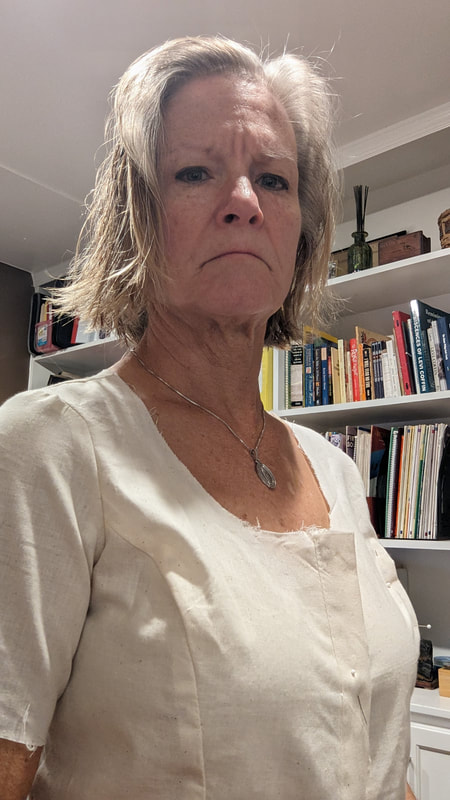
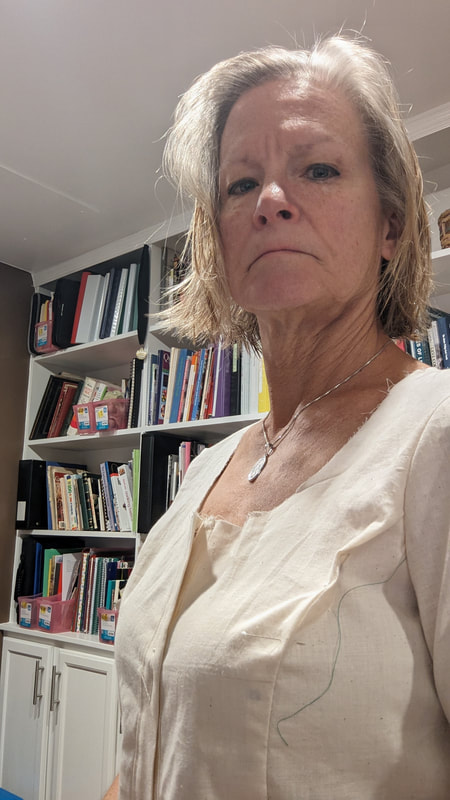
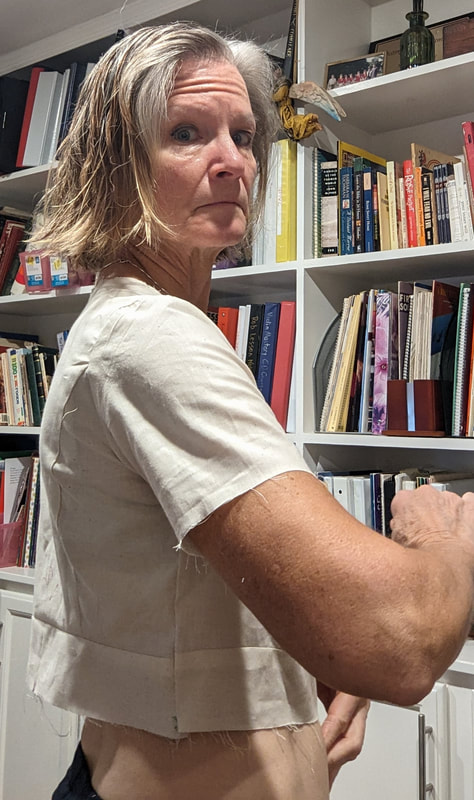
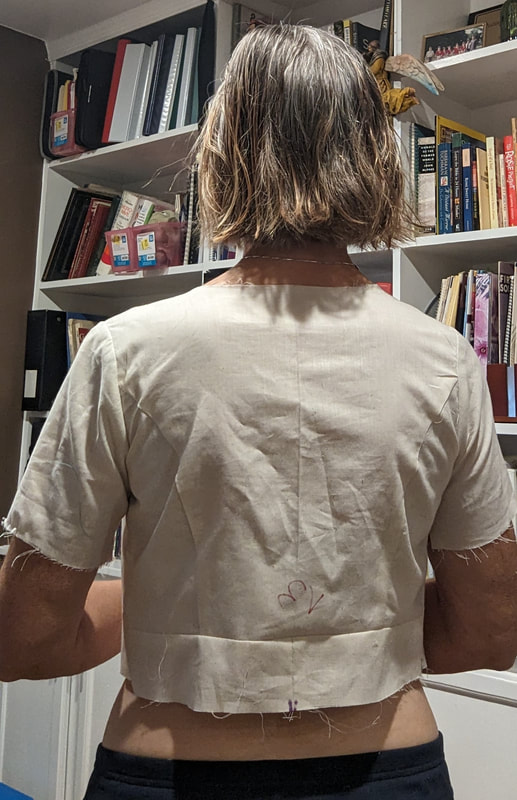
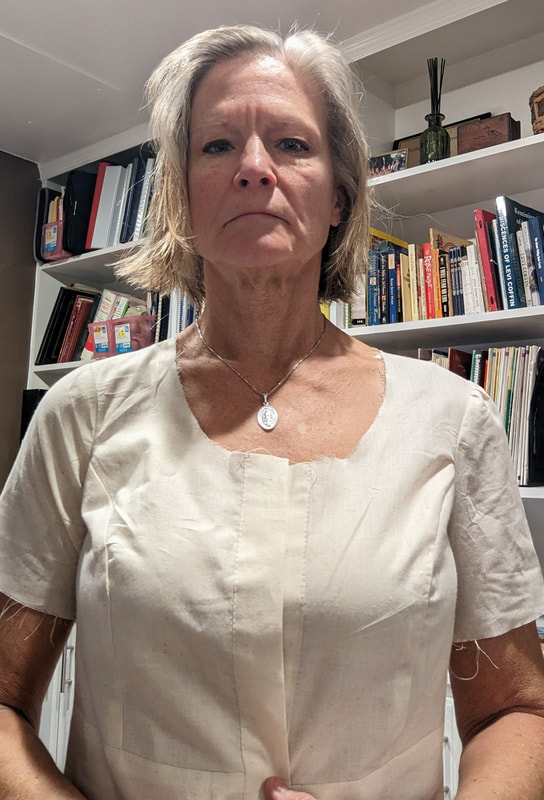
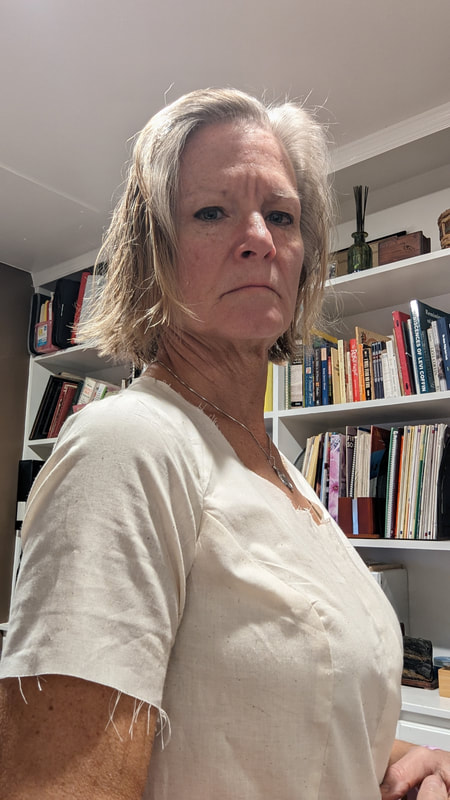
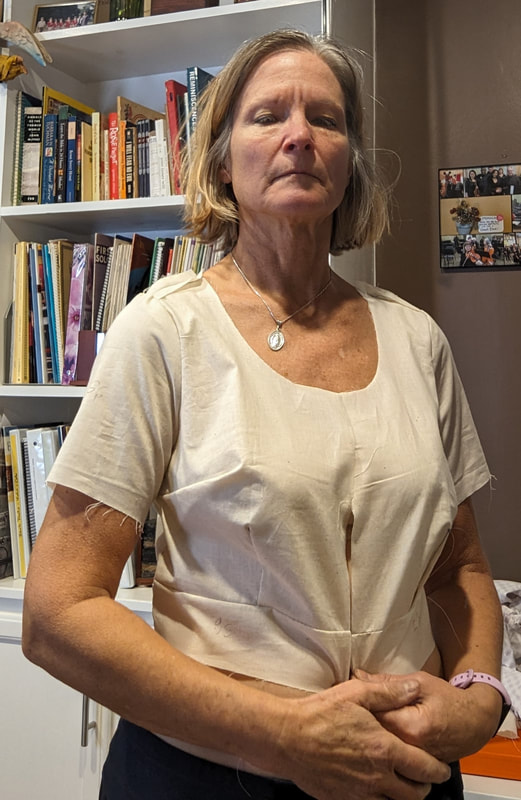
Back to the dress I knew I'd have to close up the back and cut the front open to add plackets and buttons, but I didn't think that would be too big a deal. I don't know what my problem is, but fuck, 5 muslins and I'm still not ready to cut into good fabric. One thing is I have not been super careful keeping track of things. The first muslin was pretty close, so I guess I was sure if I made a couple tweaks, I'd be there. But no, 5 muslins later and I'm not 100% which mockups are which versions, especially what size sleeves I stuck in each one. Ooopsie. 1. Cup C/D, Size 4This was supposed to grade to size 6 at waist and hips, but I think I forgot. Also, I might have cut out size 6 sleeves. FIT: Princess seam way to the left and right of boobs (toward side seams). Extra fabric above boob, too tight across bust. Shoulders tight. Back waistline too high. 2. Cup E/F, Size 4 to 8Not sure of sleeve size. Might be a 2, as instructed. Fit: Seems to have more comfortable torso fit, but there is more extra fabric on princess seam, and that seam is still on the outside of the boobs rather than along them. Shoulders still tight. Extra loose around front neckline. Back waistline too high. 3. C/D, Size 4 with vertical adjustmentsI lowered the bust point 1 inch and also lengthened the torso 3/4 inch. Fit: Princess curve better fits breast shape, but it is still too far out on the outside. Shoulders are tight. Neckline is loose. Back waistline is too high. 4. E/F, Size 2 to 8 with vertical adjustmentsI lowered the bust point 1 inch and also lengthened the torso 3/4 inch. Fit: Best so far but too much fabric around princess seam, and much too loose at front neckline. 5. E/F, Size 2 to 8, with adjustments and CF subtractionIn addition to lowering the bust point, I increased the length on the torso to 1 full inch. The major change here was that I took out width from center front seam. I think it was 2 full inches. It might have been 1. To add back in the missing width at the waist and hips, I added it to the side seams so the CF stayed on grain. The point of this change was to remove all the neckline gaping and bring the bust curve closer to the bust. It worked! Unfortunately, it also screwed up everything else. The armholes are way too tight and the back is too tight (how?) Fit: The princess seam goes mostly where it should along breast. It is too tight across the back, shoulders, armscye, and now chest again. The back waistline still too high. Comparison of Front Torsos Comparison of Back Torsos Comparison of Side Torsos On Review of the Fit I think I will go back to the C/D cup, size 4. The changes I will start with are:
Change of Plan I saw a video where someone explained how princess seams are darts. So I decided to sew the darted version to see exactly how the darts were designed and I figured they'd be easier to adjust. So I sewed a C/D bust, size 4 grading to 6 at the waist. I sewed size 6 sleeves into the size 4 armholes. I did lengthen the bodice 1" but I didn't lower the bust point yet. I did move the shoulder seam at the shoulder 1/2" forward. Fit: I don't know. Feels more comfortable, but doesn't look very fitted! The bust dart is too low and needs to move an inch toward the center front. (I only sewed one bust dart up.) The back still hikes up. The armpits are too tight. Also, the front waist darts need to be moved an inch toward the center front. I think the front shoulder adjustment helped.
Also, don't know what the fuck is happening in the back. The back waistband is smaller than the back so I "eased" it in on this mockup. Next:
This isn't how I planned it.
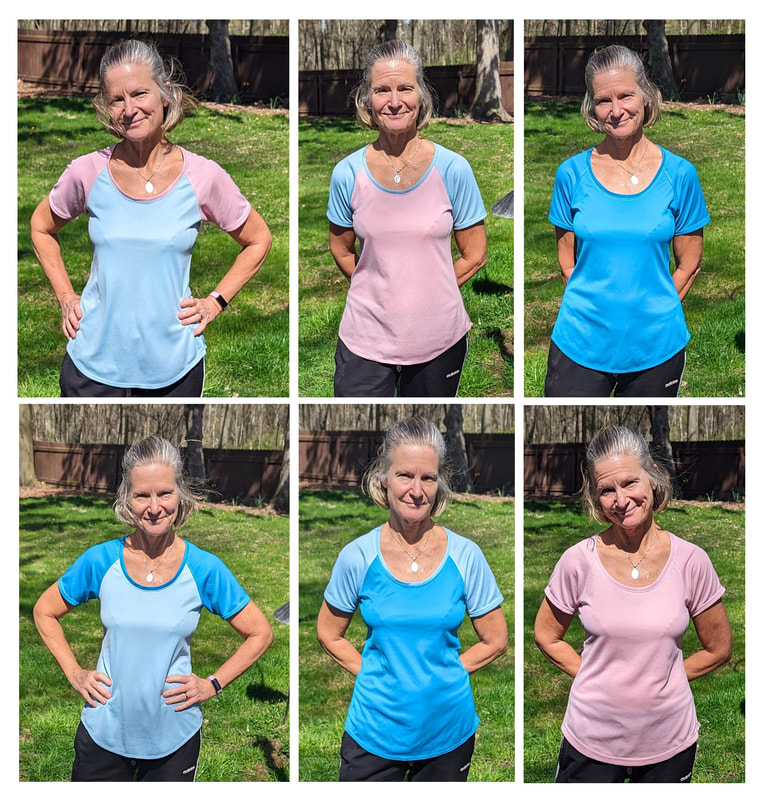
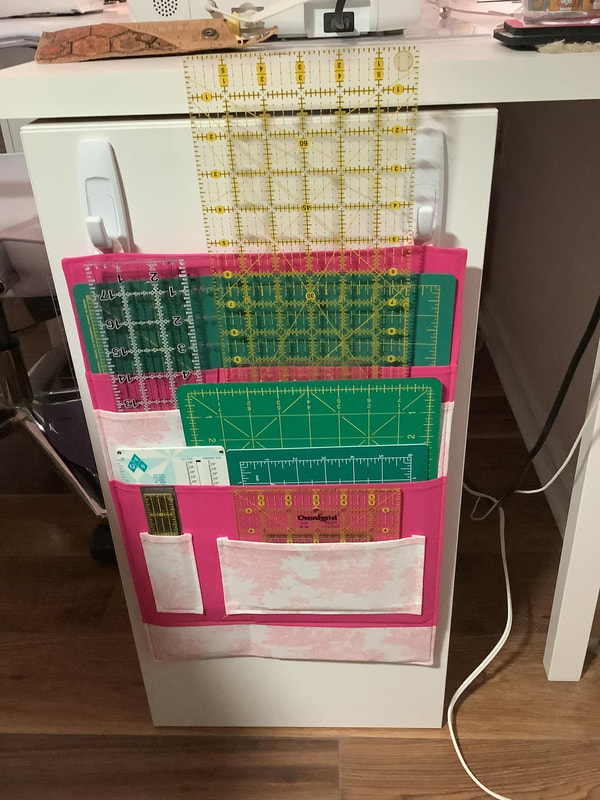
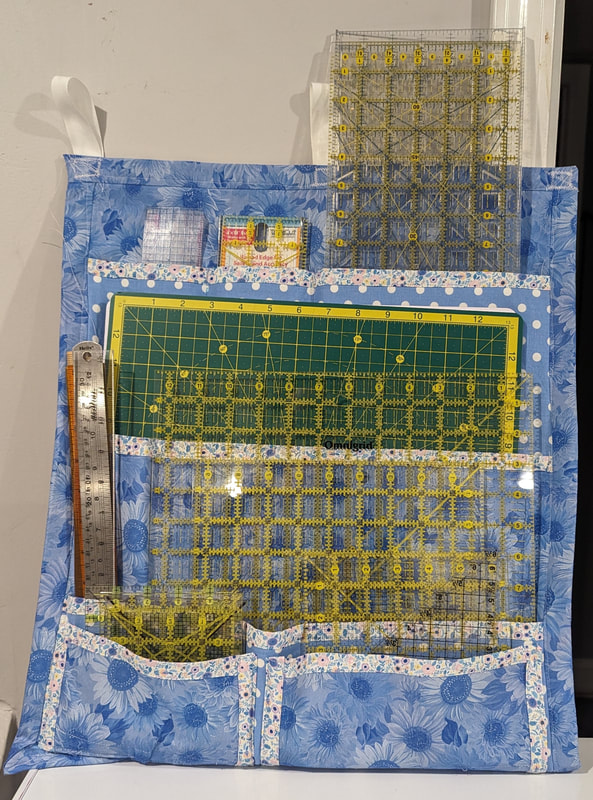
I went looking for "performance jersey" to make more tennis tee shirts and tanks. I found this stuff called "moisture wicking." Looks a little like pique on one side and PVC on the other. Bought 2 yards of three different colors, but didn't notice that the PVC side is supposed to be worn on the outside or else "the moisture wicking won't work." So in the end, they look a little shiny and not as I had imagined or hoped. And even though I had planned to make 3 tee shirts and 3 tank tops, which would not have been that nuts, I ended up zoning out while cutting, thinking "oh, I have enough for sleeves for all the shirts." So now I have 6 new tennis tees. I have worn a couple and they are not all that cool. I don't know how long into the heat of summer I'll be able to wear them. Oh well. Sadly, I don't know where I saw this idea, so I can't credit the person who came up with it. It's pretty cool, no? So today I decided to make it. I thought it would take me a couple hours. It took me all day. Fortunately, I made a pattern out of paper. As simple as it looks, my set of rulers is a little different and I had to work out a couple things and the sequencing of sewing it all together.
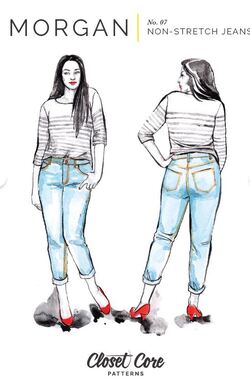
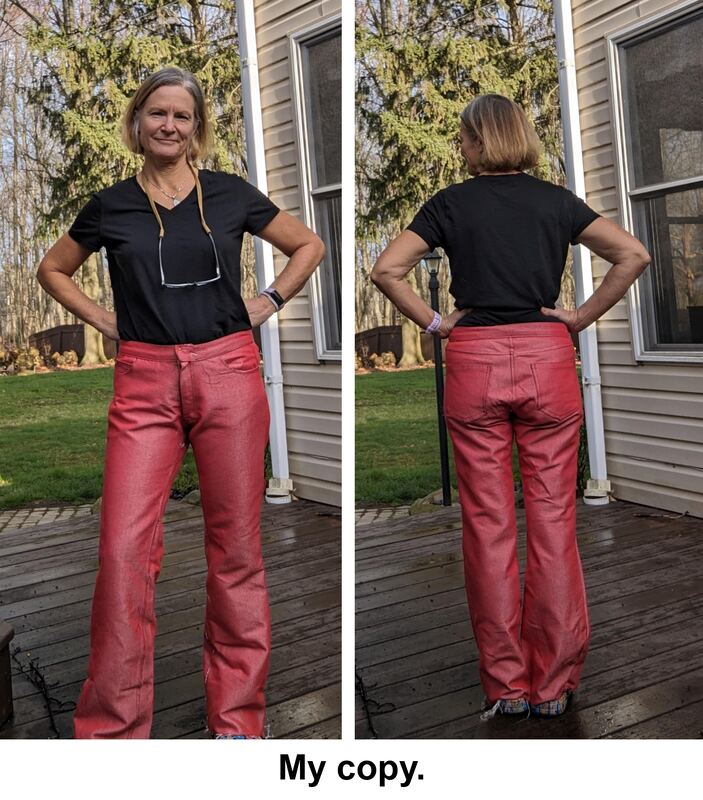
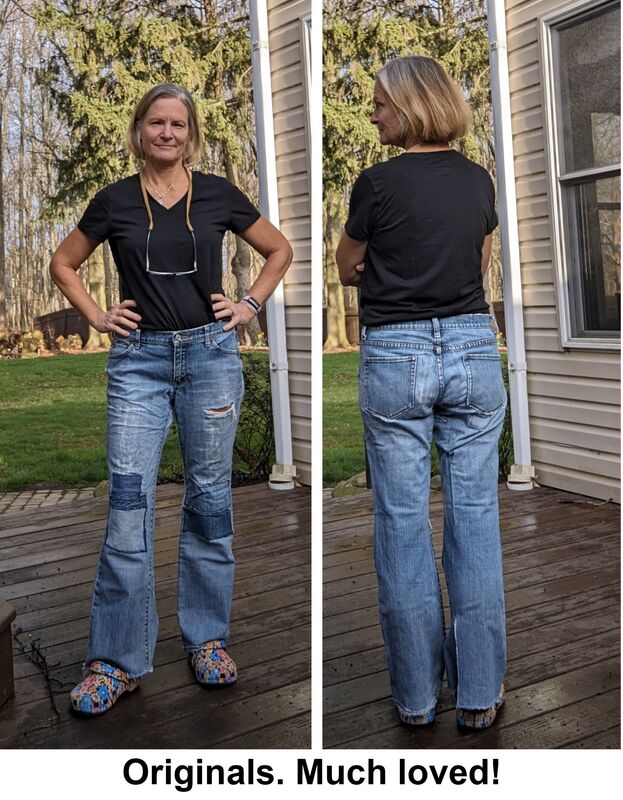
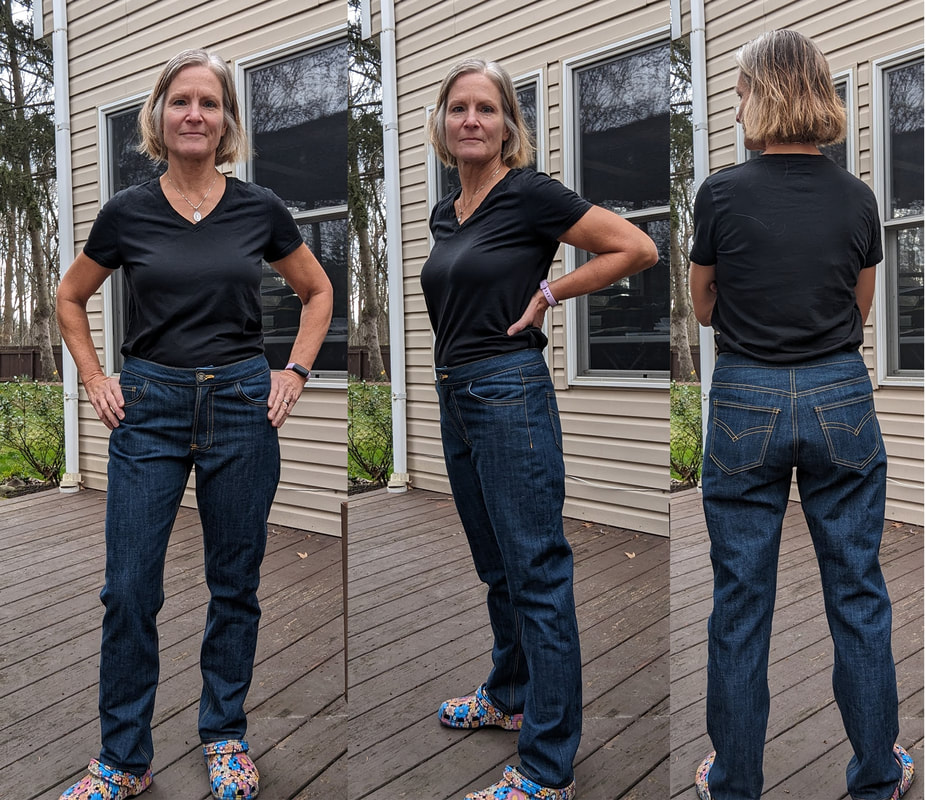
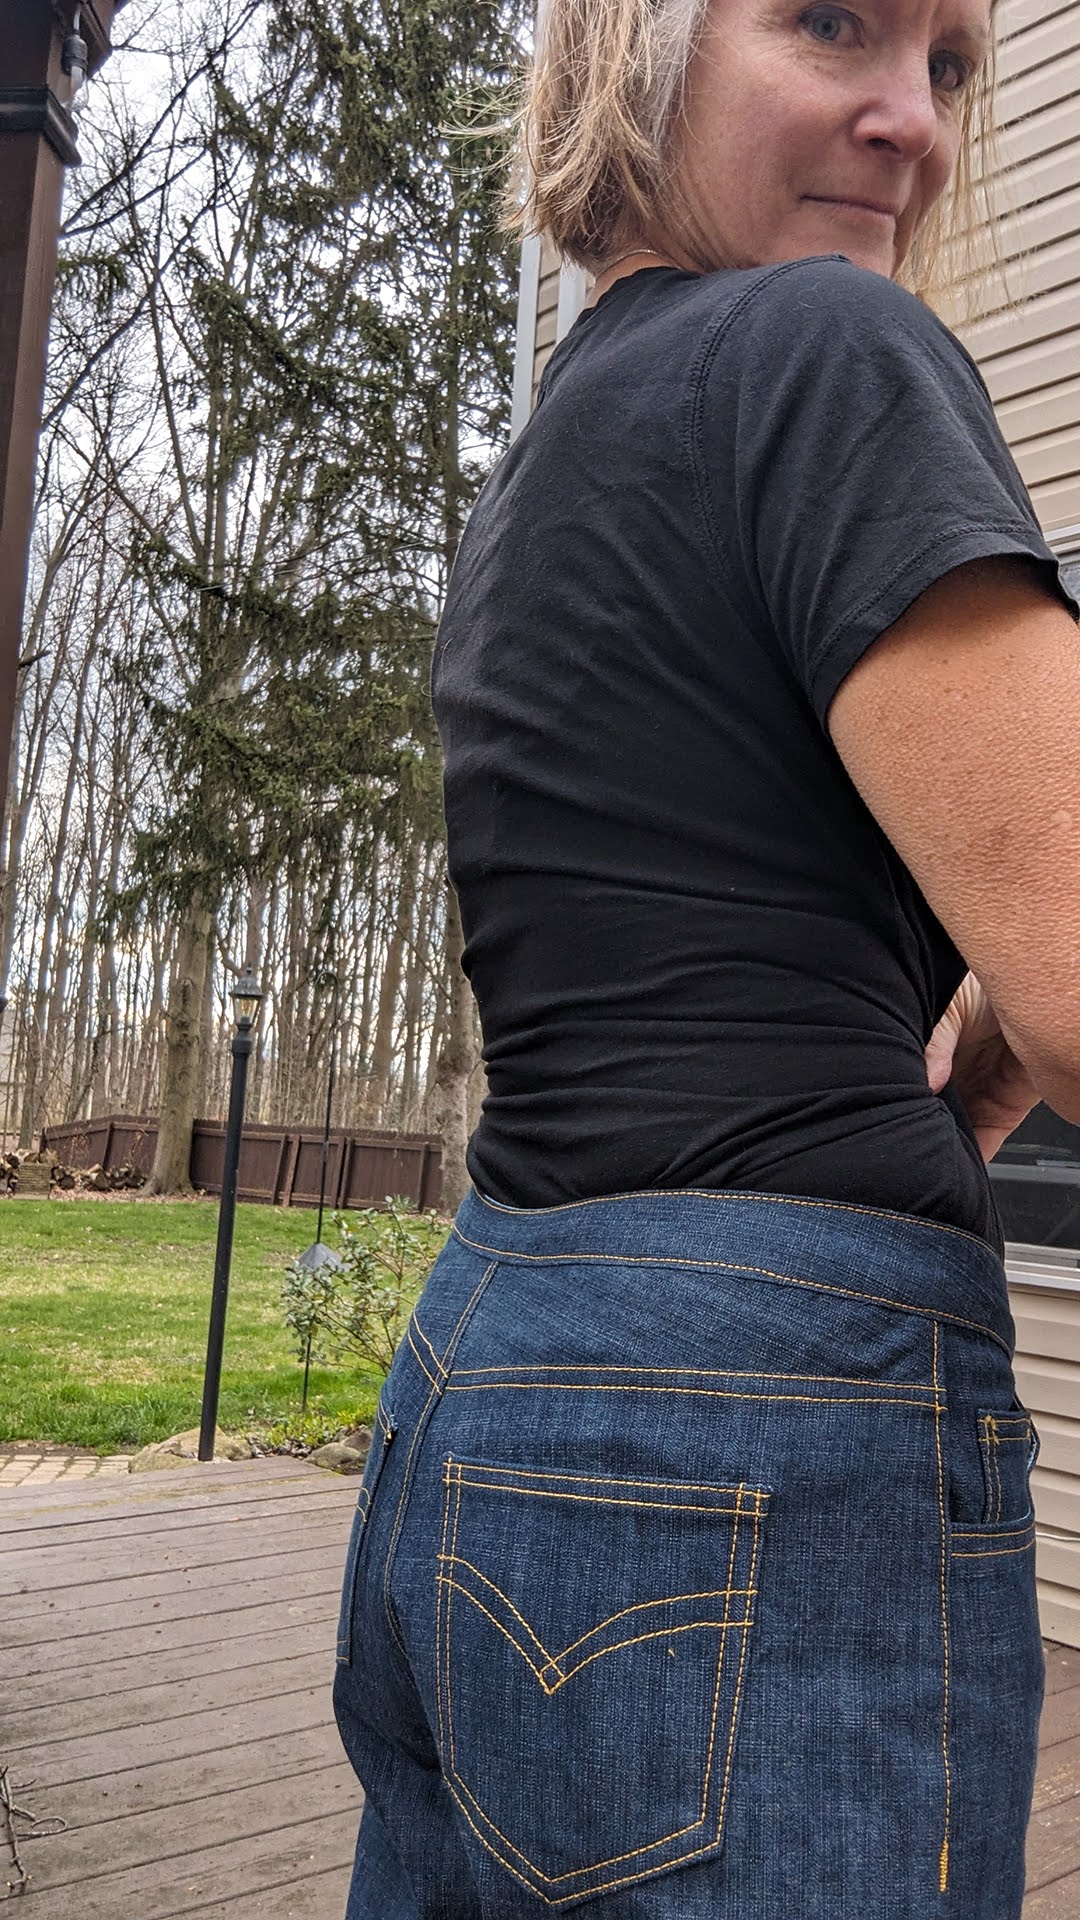
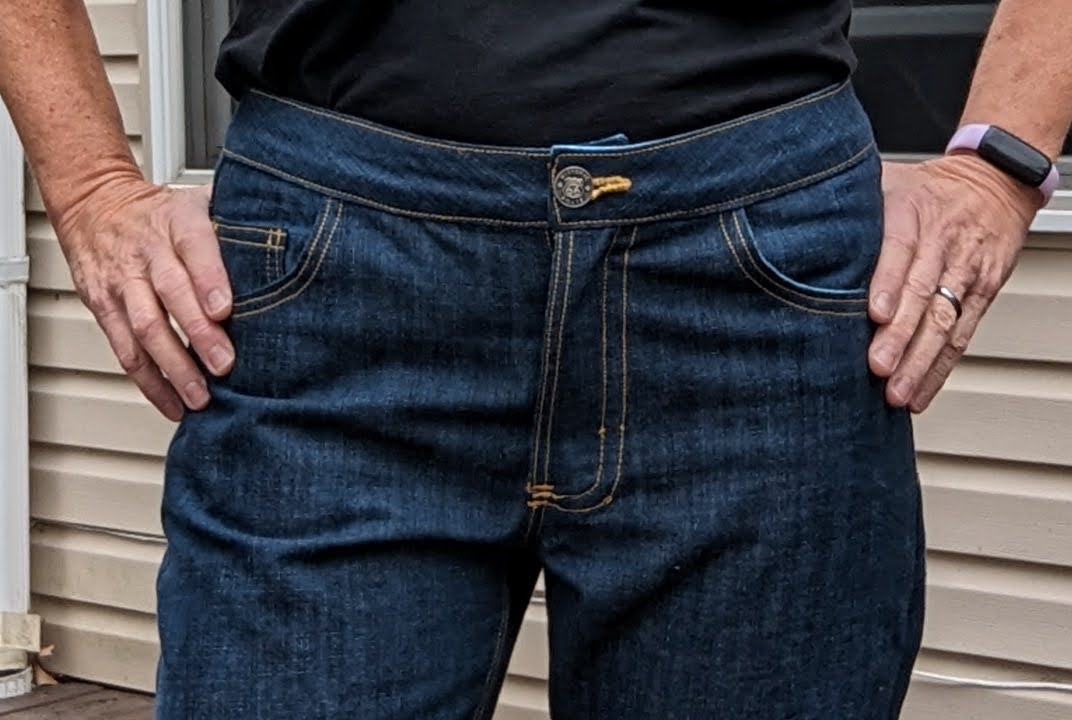
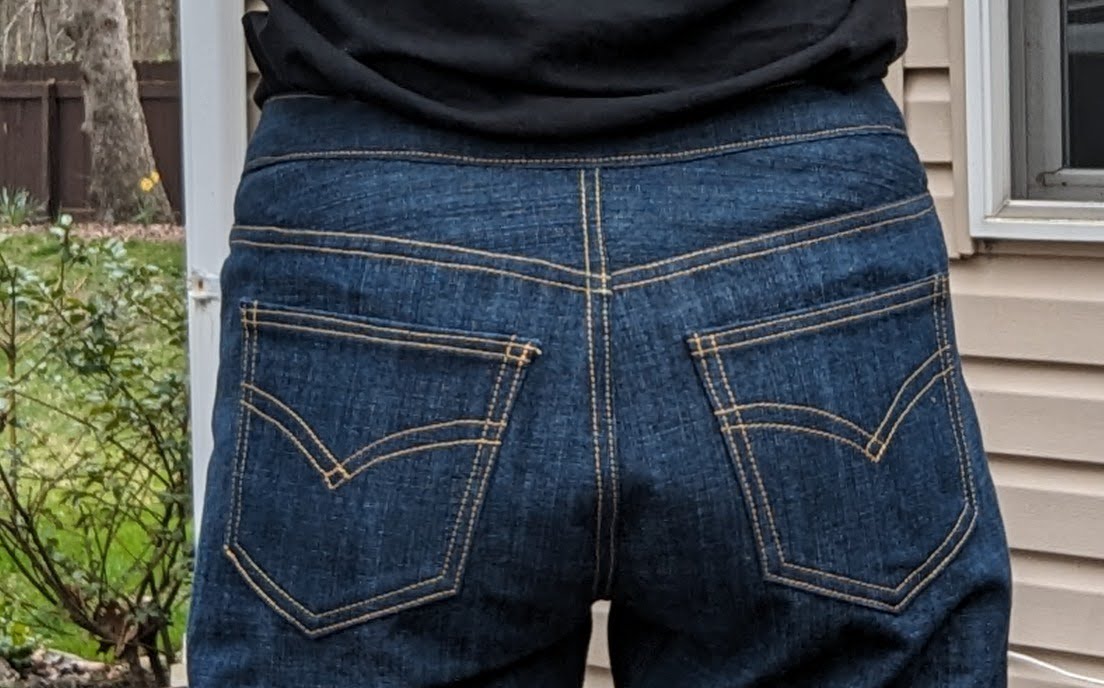
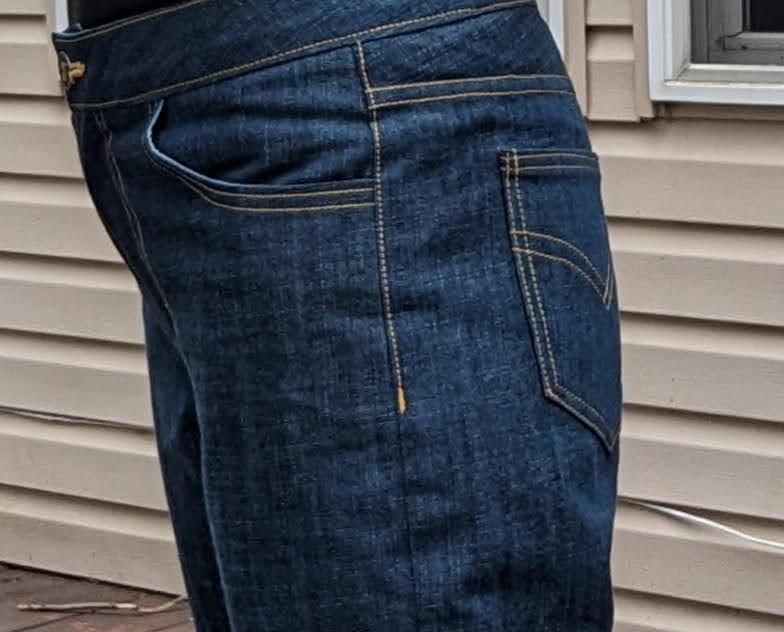
It's not bad, and I hope it doesn't fall off the wall once I hang it. So I made jeans. I surprise myself sometimes. It took me about a week or two to complete these once I cut out the denim. But the Saga of the Jeans is a much longer story. About 15 years ago, I wanted to recreate pair of Gap jeans I loved. I drafted a pattern and then I proceeded to mock it up repeatedly over the years. I've made at least 3 pairs, two in muslin and one in a hideous red and white denim I got from a Mood sale. I got so close with the hideous red pair; they fit nicely, but before I could make the final tweaks and make them in a nice fabric, I gained weight, lost weight, gained weight, lost weight, and ultimately lost track of what I was doing (where were the most recent pattern pieces?) and generally got stuck. A month or so ago I thought screw it: Morgan jeans is the closest pattern I know to what I want (mid-rise, nonstretch, relaxed leg), so I will just get it and make it. I made a muslin (size 10) in a week, and it fit really well. It was difficult to figure out the zipper, but it seemed to be okay in the muslin once done. Of course, Morgan comes with a button fly, and you have to look elsewhere for the zipper fly instructions. So I went ahead with the denim. And I had trouble with the damned zipper. Even though I had already done the muslin, I still needed to watch tutorials over and over, and still I screwed it up three times. The zipper was never in the right place once it was sewn in on both sides (and topstiched, mind you). I watched 3 main sewalongs: one for Ginger jeans, which shows a zipper fly construction that can be essentially "copy pasted" into the Morgan construction in place of the button fly. But it was not super clear, and it didn't work for me. There's another really nicely explained tutorial for a cut-on fly, and that should have worked, but it didn't. The third tutorial was a sewalong for the Morgans, which covers only the button fly but it was extremely well done and helpful on everything but the fly; I wish she would add an addendum with zipper fly instructions! Finally, I just eyeballed where it should be once sewn in and winged it from there. A royal PIA. Why is it so fucking hard to explain? Aside from wonky topstitching, especially along the fly, these turned out pretty well, and I'm pleased. They are very comfortable though a smidge tight in the knees of all places. One other thing that is kind of wonky is the back waistband. The original waistband fit well but it came up high on my back. Lots of pants do that on me. But my husband suggested the pants would look better with it lowered, so I did that after all the pieces were cut out (and basted on). I'm not sure how you'd do it for reals, but I just trimmed a scoop out of the waistband and facing. I probably went a little overboard. Topstitching is okay in most places. Really a pain to have just one sewing machine. So midproject I went and got a used Pfaff. But it didn't end up helping on this project. It either doesn't handle topstitching thread or I haven't found the magic combination of tension settings. Oh, and I handstitched that button hole. My machine wasn't having it. At all. Belt Loops?Oh, yeah. PS, no belt loops. I did cut them out and prep them for sewing, but as I was getting ready to sew, I realized it was going to be a shit show to sew them on. Is it my machine? Is it the topstitching thread? Is it the needle? I don't know but the needle struggles to go through that many thicknesses of fabric, the thread routinely breaks off in those areas, and the needle broke a few times (though sometimes that was because it hit the zipper). I use an expensive and regularly maintained Pfaff Ambition 1.5 (admittedly now discontinued), Gutermann thread, and a dedicated topstitching needle, so who knows? Anywho, I never wear belts ever, so why add belt loops? Of course, I don't carry coins around in my pockets either, so. Hypocrisy!
So I started playing tennis at an indoor club in January 2024. I had a few tops I'd accumulated made out of the new-to-me performance jersey. It turns out that I really like playing in this material. I only have 3 of these, though, and those that I have are a little tacky. One is a shirt I got after doing the Rugged Maniac event. It's got a lot of writing on it, my favorite of which is "Finisher" in big letters on the back hahahaha. Another is one I got for Xmas, and it's got a company logo on it because the giver could get a lot of tchotchke from her job. The other one turned up a few years ago in the wash and no one claimed it. It's black with weirdly shaped stripes down the side.
When I remembered that I had a stash of Nike performance jersey—blue, red, maroon, and black—I decided to make some tops for tennis. I had already used some blue and black to make a Jalie raglan top that I use as a lightweight pullover, and I ended up getting 5 tops out of the fabric I had left. It's still cold here, so T-shirts seemed to make sense, but it has been warm a few days, making me realize I'll want tanks when the time comes. So I made a mix of both. In the end, what I sewed was determined by how much fabric I had. I made 3 tees shirts and two tanks.
|
AuthorI am a wife and mother. I am retired: yay! Archives
June 2024
Categories
All
|







 RSS Feed