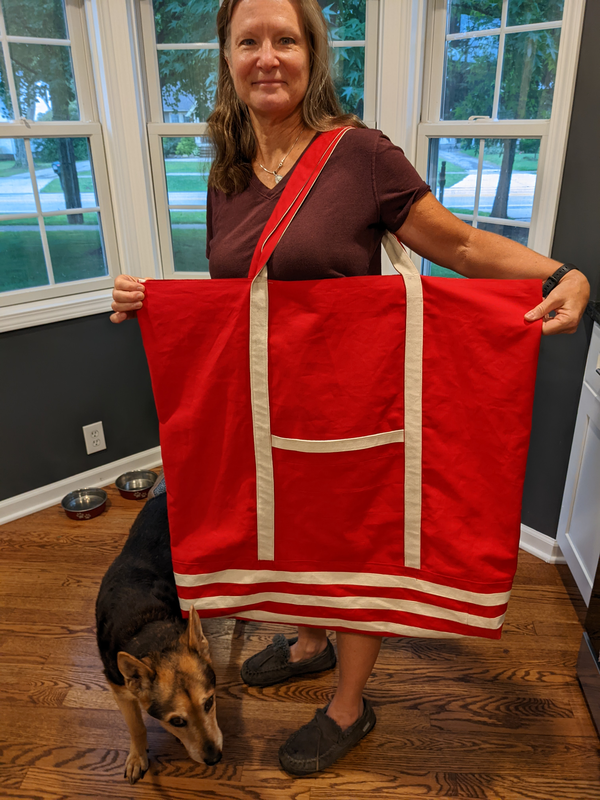
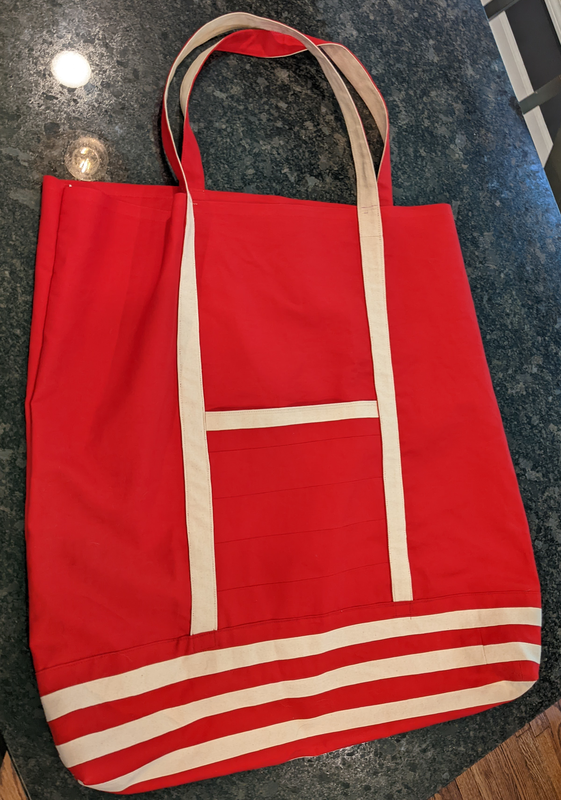
I made this kick-ass bag! Very simple to construct...if you are not me. It seems I am doomed to turn even the simplest of projects into a shit show, and this one was no exception. Still, it turned out pretty awesome. It is rather enormous...it needed to be this size...but I hope it holds up and does its job.
It started like this...I bought a fence to take camping so we can let The White Ingrate hang out outside, without being tied up.
It started like this...I bought a fence to take camping so we can let The White Ingrate hang out outside, without being tied up.
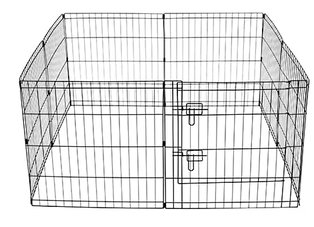

It came in a big cardboard box, and I was surprised at how heavy it was. Not awful, but heavy enough that it might be awkward to cart around. Thinking of tent- and Clam -carrying cases, it struck me that a similar bag for the fence would be nice. At first I thought I'd make a case with a zipper, but I quickly realized that that would be unnecessary and a bag open at the top would be fine. I stopped at Joann's and got some red and cream cotton canvas duck. It wasn't on sale, so I went with the minimum I thought I could get away with. At least I had measured the fence and done a little research on bag construction beforehand (two nice vids here and here), so I had some idea about what I needed.
Once I got home, I proceeded carefully, nervous about the amount of fabric I had to work with. God forbid I'd have to go back and get more fabric. Not for the time, the drive, the gas, the expense, but for the embarrassment. I decided to first cut out the main panel, since it would be the largest bit of fabric I'd need to cut and if I made a mistake with it, I'd be history. I'd seen a few options for constructing the sides—cutting a front and back, cutting a side, back, and bottom panel, and adding a lining—but in the end I cut one piece for front, back, and bottom and decided on no lining. It's only for carrying a damned dog fence after all.
After that, things didn't go according to plan.
I needed enough fabric to make two, two-colored handles, a pocket, and a bottom reinforcement panel. (After looking at the way the handles were attached on a canvas Lands End bag I have, I saw that the best way to hide the bottoms of the handles was with a panel along the bottom, but also I thought it couldn't hurt to add some reinforcement.)
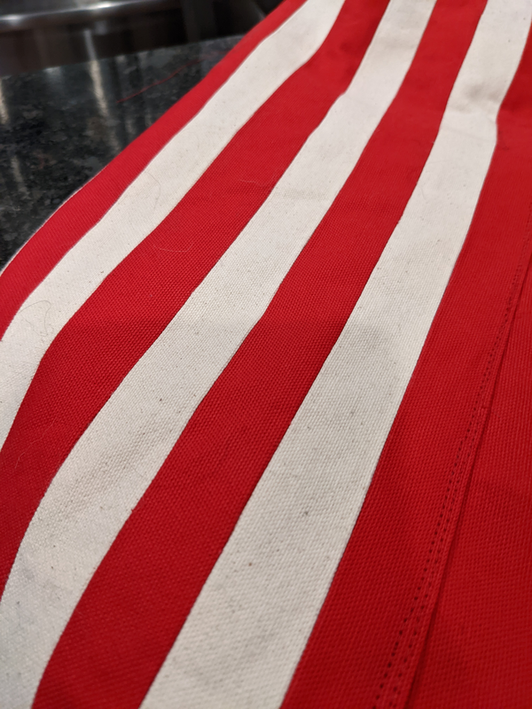
But after cutting out strips for the handles, I realized I had measured them wrong. I had measured the Lands End bag handles and then cut strips out of the red and white fabric. I realized they were too narrow after I had partially constructed the first strap: I had sewed a red and white strip together (to make the front and backs of the handles), folded in the ends, and then folded everything in half again. When I compared the would-be handle to the Lands End handle, mine was a quarter inch too narrow. That seems small, but it was enough to make a big difference in how the handle felt (the Lands End handle was just 1.25 inches wide). Fortunately, I compared before sewing the folded bits together permanently.
I remeasured the fabric that remained and had barely enough to cut new strips a little wider, though not as wide as I would have liked. But once the new strips were cut, the white fabric was gone and there was just a little strip of red left. I didn't have a big enough piece even for the pocket and definitely enough not for a bottom panel.
But...I had two very, very long red and white striped pieces and that one strip of red. While it's just a bag for carrying a damned dog fence, I wanted that panel and the pocket, so I spent more time than a neurally normal person might have spent reconstructing fabric. I sewed and ironed the red and white strips together and ended up with a reconstructed piece just big enough for the bottom.
Once I got home, I proceeded carefully, nervous about the amount of fabric I had to work with. God forbid I'd have to go back and get more fabric. Not for the time, the drive, the gas, the expense, but for the embarrassment. I decided to first cut out the main panel, since it would be the largest bit of fabric I'd need to cut and if I made a mistake with it, I'd be history. I'd seen a few options for constructing the sides—cutting a front and back, cutting a side, back, and bottom panel, and adding a lining—but in the end I cut one piece for front, back, and bottom and decided on no lining. It's only for carrying a damned dog fence after all.
After that, things didn't go according to plan.
I needed enough fabric to make two, two-colored handles, a pocket, and a bottom reinforcement panel. (After looking at the way the handles were attached on a canvas Lands End bag I have, I saw that the best way to hide the bottoms of the handles was with a panel along the bottom, but also I thought it couldn't hurt to add some reinforcement.)
But after cutting out strips for the handles, I realized I had measured them wrong. I had measured the Lands End bag handles and then cut strips out of the red and white fabric. I realized they were too narrow after I had partially constructed the first strap: I had sewed a red and white strip together (to make the front and backs of the handles), folded in the ends, and then folded everything in half again. When I compared the would-be handle to the Lands End handle, mine was a quarter inch too narrow. That seems small, but it was enough to make a big difference in how the handle felt (the Lands End handle was just 1.25 inches wide). Fortunately, I compared before sewing the folded bits together permanently.
I remeasured the fabric that remained and had barely enough to cut new strips a little wider, though not as wide as I would have liked. But once the new strips were cut, the white fabric was gone and there was just a little strip of red left. I didn't have a big enough piece even for the pocket and definitely enough not for a bottom panel.
But...I had two very, very long red and white striped pieces and that one strip of red. While it's just a bag for carrying a damned dog fence, I wanted that panel and the pocket, so I spent more time than a neurally normal person might have spent reconstructing fabric. I sewed and ironed the red and white strips together and ended up with a reconstructed piece just big enough for the bottom.
Then I cut the red remnant into short strips and sewed them together with the last cutoff of the red and white strip to make a piece big enough for the pocket.
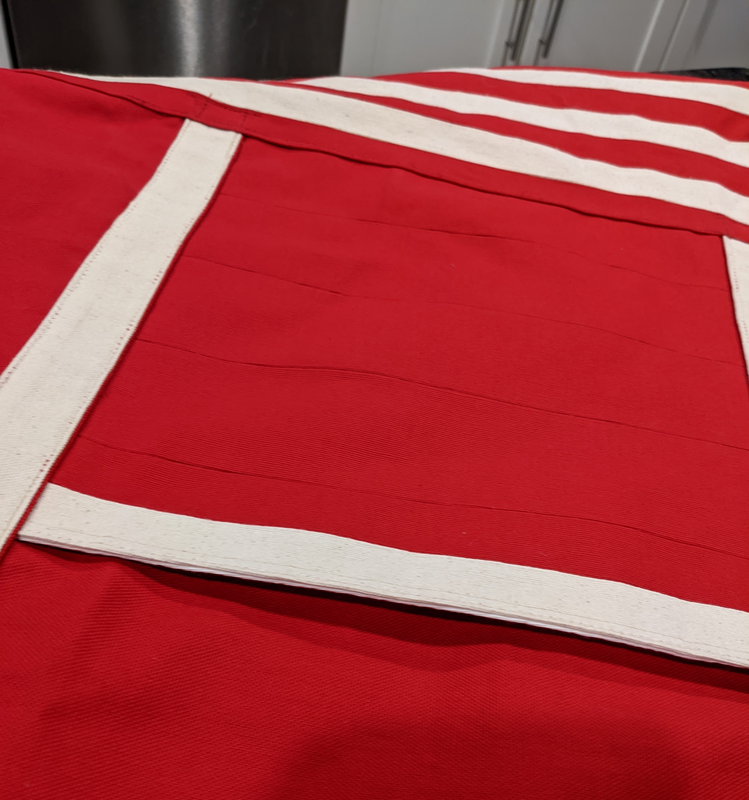
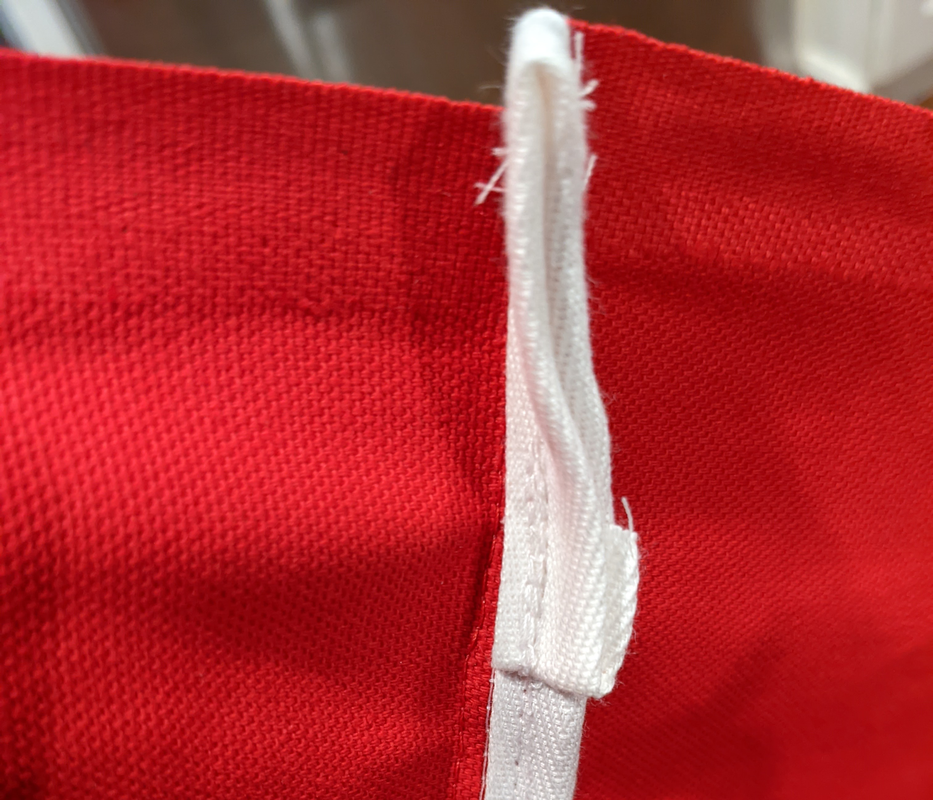
Finally, to finish the inside seams, I copied the construction on the Lands End bag and covered the seams in 1-inch wide twill tape. I have enough of this tape to last a life time left over from the Civil War ballgown project.
While it took about 8 hours to make this final bag, damn, it turned out sweet!
Finally, a side note about my sewing machine. I used a jeans needle, and my Pfaff Ambition 1.5 handled every seam and intersection on this canvas duck beautifully.
 RSS Feed