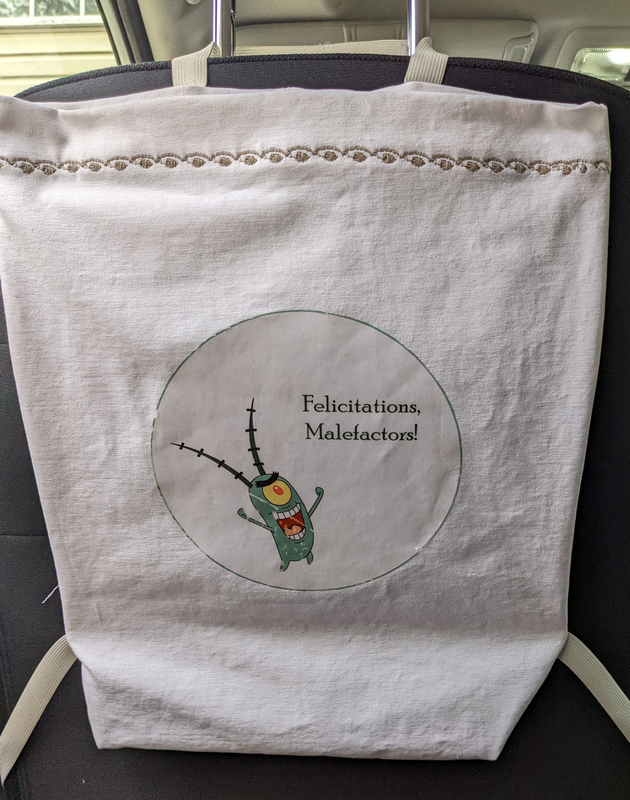
It's not perfect. Mishaps occurred in the making, as per usual, but it will serve its function and I think it's amusing.
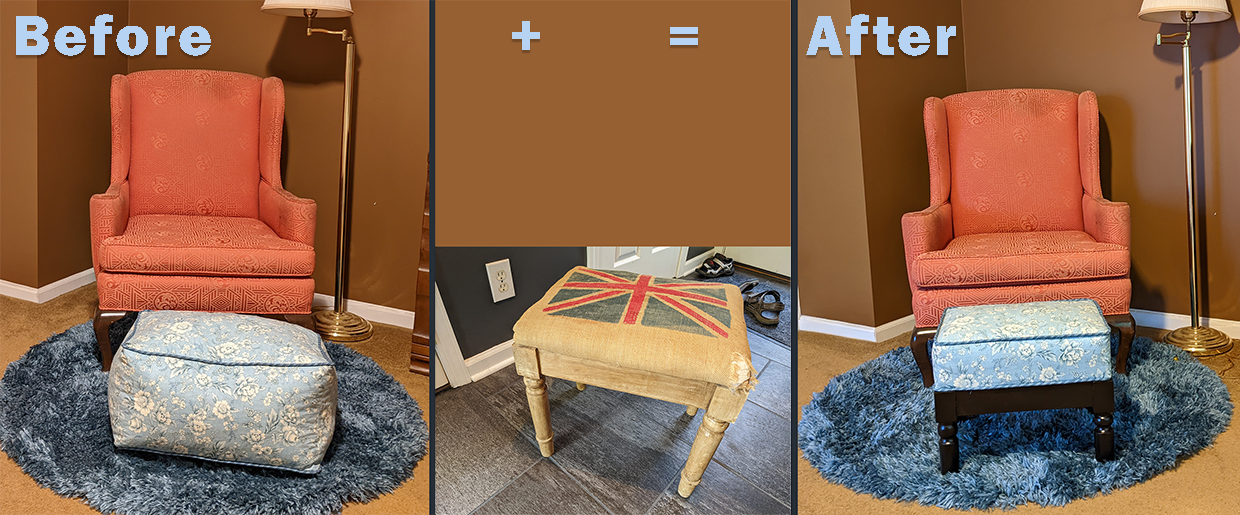
I have been thinking I should get a car trash can. Then I saw someone with a nice one that hung over the back of the driver's seat. Hers is tubular, compressible mesh. I went searching at Amazon, but couldn't find hers exactly, and I didn't really like what I saw.
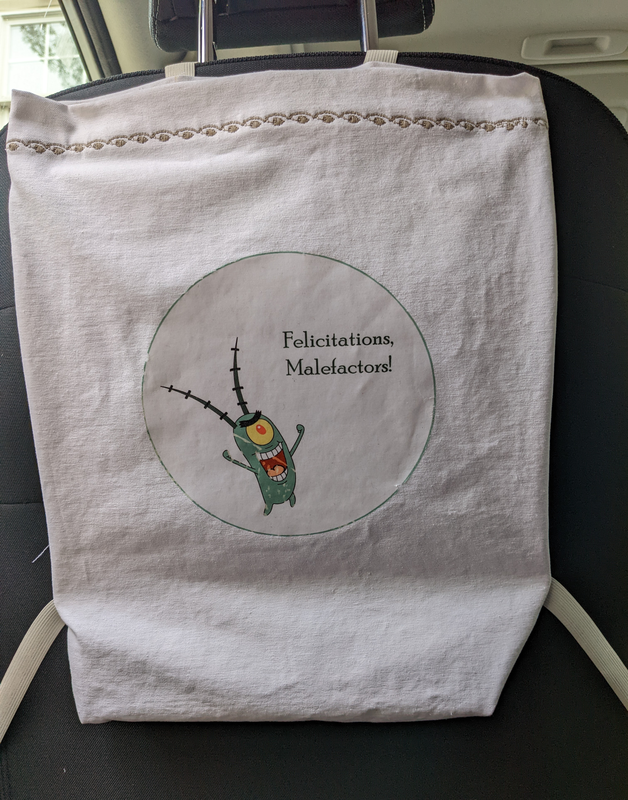
Then I had an idea to make my own. Just a cloth bag with some way to attach around the seat. As I was searching for fabric, I remembered this white twill I had left over from my Regency stay project. I had plenty. Next the straps turned into elastic, which I first thought I'd stretch into place, but then I realized cutting each strap in half and attaching Velcro would be much more practical.
With all that white, I realized I could put some design on. At first I thought applique, but then it seemed like so much work and I had no good ideas for design. And then I got the brainstorm to do an iron-on transfer.
I have been thinking I should get a car trash can. Then I saw someone with a nice one that hung over the back of the driver's seat. Hers is tubular, compressible mesh. I went searching at Amazon, but couldn't find hers exactly, and I didn't really like what I saw.
Then I had an idea to make my own. Just a cloth bag with some way to attach around the seat. As I was searching for fabric, I remembered this white twill I had left over from my Regency stay project. I had plenty. Next the straps turned into elastic, which I first thought I'd stretch into place, but then I realized cutting each strap in half and attaching Velcro would be much more practical.
With all that white, I realized I could put some design on. At first I thought applique, but then it seemed like so much work and I had no good ideas for design. And then I got the brainstorm to do an iron-on transfer.
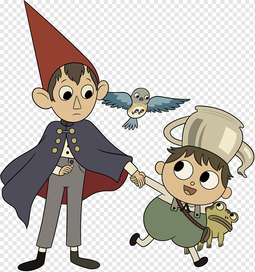
I had just done one for my daughter, a shirt for her birthday. It was a dark Carhartt's shirt, and I used my last dark iron-on transfer sheet for it. I put this image from Over the Garden Wall on it. That one turned out really nice.
I'm trying to be good and read and reread directions, but at some point I just lurch forward and do something, and inevitably one of those somethings is done wrong. This time, I put the sheet onto the fabric wrong side up and hit it with the iron. That's why Plankton has a slash across his body.
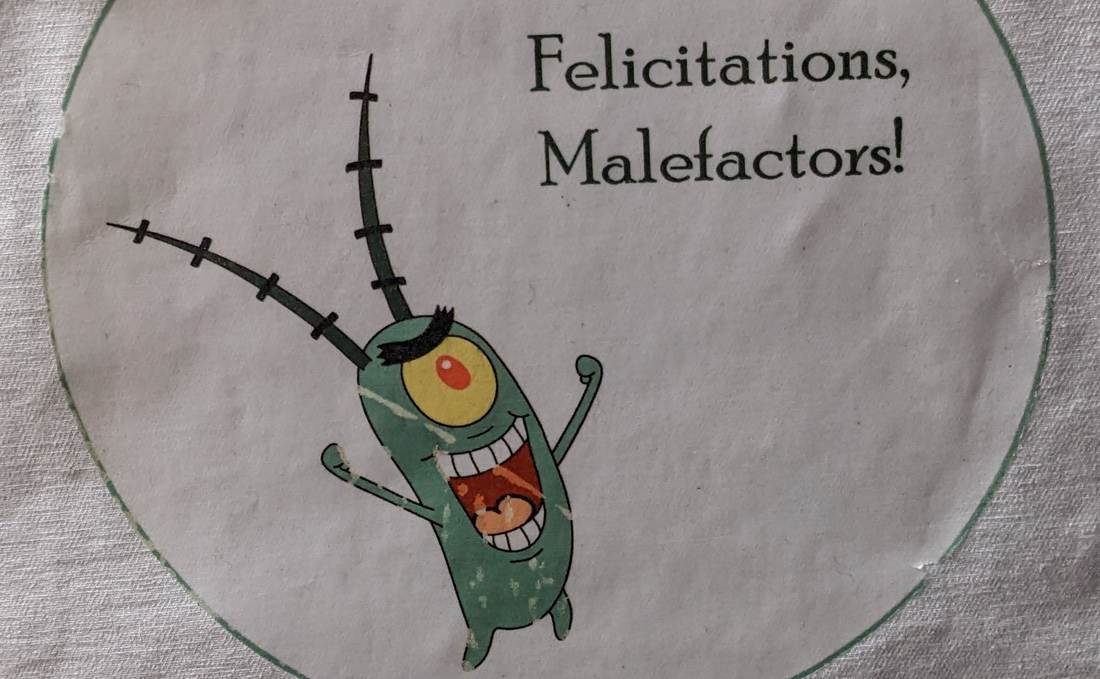
And, I suppose if I'm cataloging mishaps, I should mention the edges of the transfer were hard to peel off, and I tore them here and there. Live and learn.
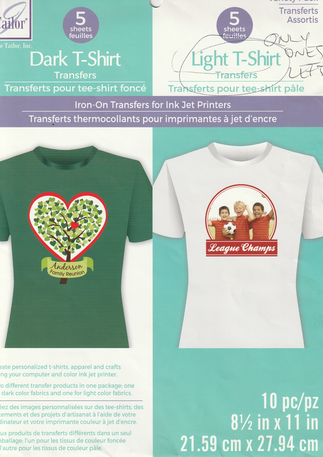
The dark transfers are done with the design face up. With the light transfers, you have to flip the image so you can iron it on with the image on the underside of the sheet and the iron on the top of the protective paper. Even after struggling a bit to figure out how I would flip my image before I printed it, I completely forgot about putting it onto the fabric so I could read the writing. At least it didn't completely wreck it.
Why didn't I just start over and make a new transfer? It's only occurring to me now that I could have. I guess I was in a state of mind from my daughter's project in which I thought I was working with the last sheet of transfer paper. Alas.
Anywho. I got the idea at the last minute to add a decorative stitch around the top. Just for fun, see what the machine could do, play with it a bit. Eh, it's okay.
I hope I won't regret that it is white. I should put some kind of liner in I guess.

 RSS Feed